Your Ultimate Guide to Creative Home and Event Decor
The Ultimate Guide to Creative Decorating: Transforming Your Space & Celebrating Life
Estimated Reading Time: 22 minutes
Key Takeaways
- Personalize Every Space: Decorating allows you to infuse personality into every corner, from serene bathrooms with thoughtful wall decor to inviting dining rooms.
- Celebrate Life’s Moments: Transform events like baby showers, autumn gatherings, and Christmas festivities with unique and themed decorations.
- Embrace DIY & Creativity: “Decora DTI” projects offer budget-friendly, personalized solutions and the satisfaction of creating something beautiful yourself.
- Plan & Budget Smartly: Effective planning, budgeting, and sourcing materials from places like Floor & Decor are crucial for successful and cost-effective decorating.
- Find Your Unique Style: Your decorating journey is a continuous process of self-discovery, allowing your home to evolve and reflect who you are.
Table of Contents
- The Art of Transformation: Unleashing Your Inner Decorator for Home & Events
- Home Sweet Home: Elevating Everyday Living with Inspired Decor
- Elevating Your Bathroom: Thoughtful Bathroom Wall Decor Ideas
- Crafting a Welcoming Dining Space: Dining Room Wall Decor & More
- The Heart of the Hearth: Inspiring Mantel Decor Ideas
- Kitchen Charm: Inspired by Martha Stewart’s Yellow Kitchen Decor
- Adding Personality with Paint Wall with Stencils
- Flooring Foundations: Exploring Floor & Decor Tiles and Locations
- Celebrating Life’s Moments: Event Decorating Ideas for Every Occasion
- Embracing Creativity: DIY & Personal Decorating Journeys
- Essential Decorating Tips & Tricks for Every Project
- Frequently Asked Questions About Decorating
- Conclusion: Your Journey to a Beautifully Decorated Life
The Art of Transformation: Unleashing Your Inner Decorator for Home & Events
Decorating is more than just arranging objects; it’s about creating an atmosphere, expressing personality, and making spaces come alive. Whether you’re envisioning a serene sanctuary in your bathroom, a vibrant gathering spot for a baby shower, or a whimsical Grinch Christmas wonderland, the world of decor offers endless possibilities. This comprehensive guide, inspired by easy and creative ideas, will take you on a journey through various decorating styles, practical tips, and imaginative projects to help you transform your home and celebrate life’s special moments with flair.
From updating everyday living areas like your dining room with captivating wall decor to preparing for joyous occasions with unique pumpkin decorating ideas or memorable graduation cap decoration, we’ll delve into how you can infuse beauty and character into every corner. We’ll explore trending materials, classic styles, and DIY approaches, ensuring you have the inspiration and knowledge to make your decorating dreams a reality.
Let’s embark on this creative adventure together, turning ordinary spaces into extraordinary experiences.
Home Sweet Home: Elevating Everyday Living with Inspired Decor
Your home is your sanctuary, a reflection of who you are. Thoughtful decoration can transform it into a more comfortable, functional, and aesthetically pleasing environment. From the moment you step inside, every room offers an opportunity for creative expression.
Elevating Your Bathroom: Thoughtful Bathroom Wall Decor Ideas
The bathroom, often overlooked, holds immense potential for design. Bathroom wall decor can significantly impact its overall feel, turning a functional space into a spa-like retreat or a vibrant splash of personality. When considering bathroom wall decor, think about moisture resistance and durability.
- Art Prints & Gallery Walls: Choose framed prints with water-resistant frames (metal or treated wood) or canvas art. A small gallery wall with botanical prints, minimalist abstracts, or serene landscapes can add sophistication. Ensure art is strategically placed away from direct shower spray.
- Mirrors with Flair: Beyond functionality, mirrors can be decorative. Opt for a mirror with an ornate frame, a unique shape (e.g., arch, irregular), or backlighting to create a focal point.
- Shelving & Storage: Floating shelves made of reclaimed wood or sleek metal can display small plants, rolled towels, scented candles, or decorative bottles. This not only adds visual interest but also provides practical storage.
- Wallpaper & Decals: An accent wall with moisture-resistant wallpaper featuring subtle patterns (e.g., geometric, damask) or removable wall decals can introduce texture and color without overwhelming the space.
- Textile Art: Consider a stylish bath mat or hand towels that complement your chosen color scheme, or even a small, framed piece of embroidered art in a guest bathroom.
- Plant Power: Live or high-quality faux plants (like ferns, snake plants, or succulents) can thrive in bathroom humidity and add a touch of natural freshness to your bathroom wall decor.
- Statement Lighting: Wall-mounted sconces or a chic overhead fixture can serve as both light sources and decorative elements, enhancing the ambiance.
When selecting your bathroom wall decor, consider the size of your bathroom, its existing fixtures, and the mood you wish to create – be it bright and airy, calming and serene, or bold and eclectic.
Crafting a Welcoming Dining Space: Dining Room Wall Decor & More
The dining room is where memories are made over shared meals. Its decor should invite conversation and comfort. Dining room wall decor plays a pivotal role in setting the tone for this communal space.
- Statement Art: A large canvas painting, a striking abstract piece, or a triptych (three-panel artwork) can immediately anchor the room and become a conversation starter. Choose art that complements your dining set and overall home aesthetic.
- Gallery Walls: Curate a collection of framed photos, prints, or even unique plates to create a personal and engaging gallery wall. Mix and match frame styles and sizes for an eclectic look, or keep them uniform for a more polished feel.
- Mirrors for Grandeur: A large, elegant mirror can make a dining room feel more spacious and luxurious by reflecting light and views. Position it strategically to capture desirable reflections.
- Decorative Paneling & Trim: Consider adding wainscoting, crown molding, or even a board-and-batten wall treatment to introduce architectural interest and texture. Paint these details in a contrasting or complementary color.
- Shelving with Purpose: Open shelving can display beautiful china, glassware, or decorative objects. Ensure items are neatly arranged to avoid clutter, using them to enhance your dining room wall decor.
- Textural Wall Coverings: Grasscloth, fabric wall coverings, or even a textured paint finish can add depth and warmth to the dining area, making it feel more intimate.
- Lighting as Art: A stunning chandelier or a series of pendant lights above the dining table is not just functional but also a significant decorative element, drawing the eye upwards.
Beyond dining room wall decor, enhance the space with a stylish rug, comfortable seating, and a well-dressed table complete with a centerpiece. The goal is to create an environment where guests feel relaxed and encouraged to linger.
The Heart of the Hearth: Inspiring Mantel Decor Ideas
The mantelpiece often serves as a focal point in a living room or family room, especially if it houses a fireplace. Mantel decor provides a perfect opportunity to showcase your style, seasonal themes, or cherished mementos.
- Anchoring Element: Start with a large piece, such as a substantial mirror, a significant piece of art, or a flat-screen TV mounted above the mantel. This establishes the visual weight.
- Layering for Depth: Lean smaller framed photos or art pieces against the larger anchor. Vary heights and textures to create visual interest.
- Symmetry vs. Asymmetry:
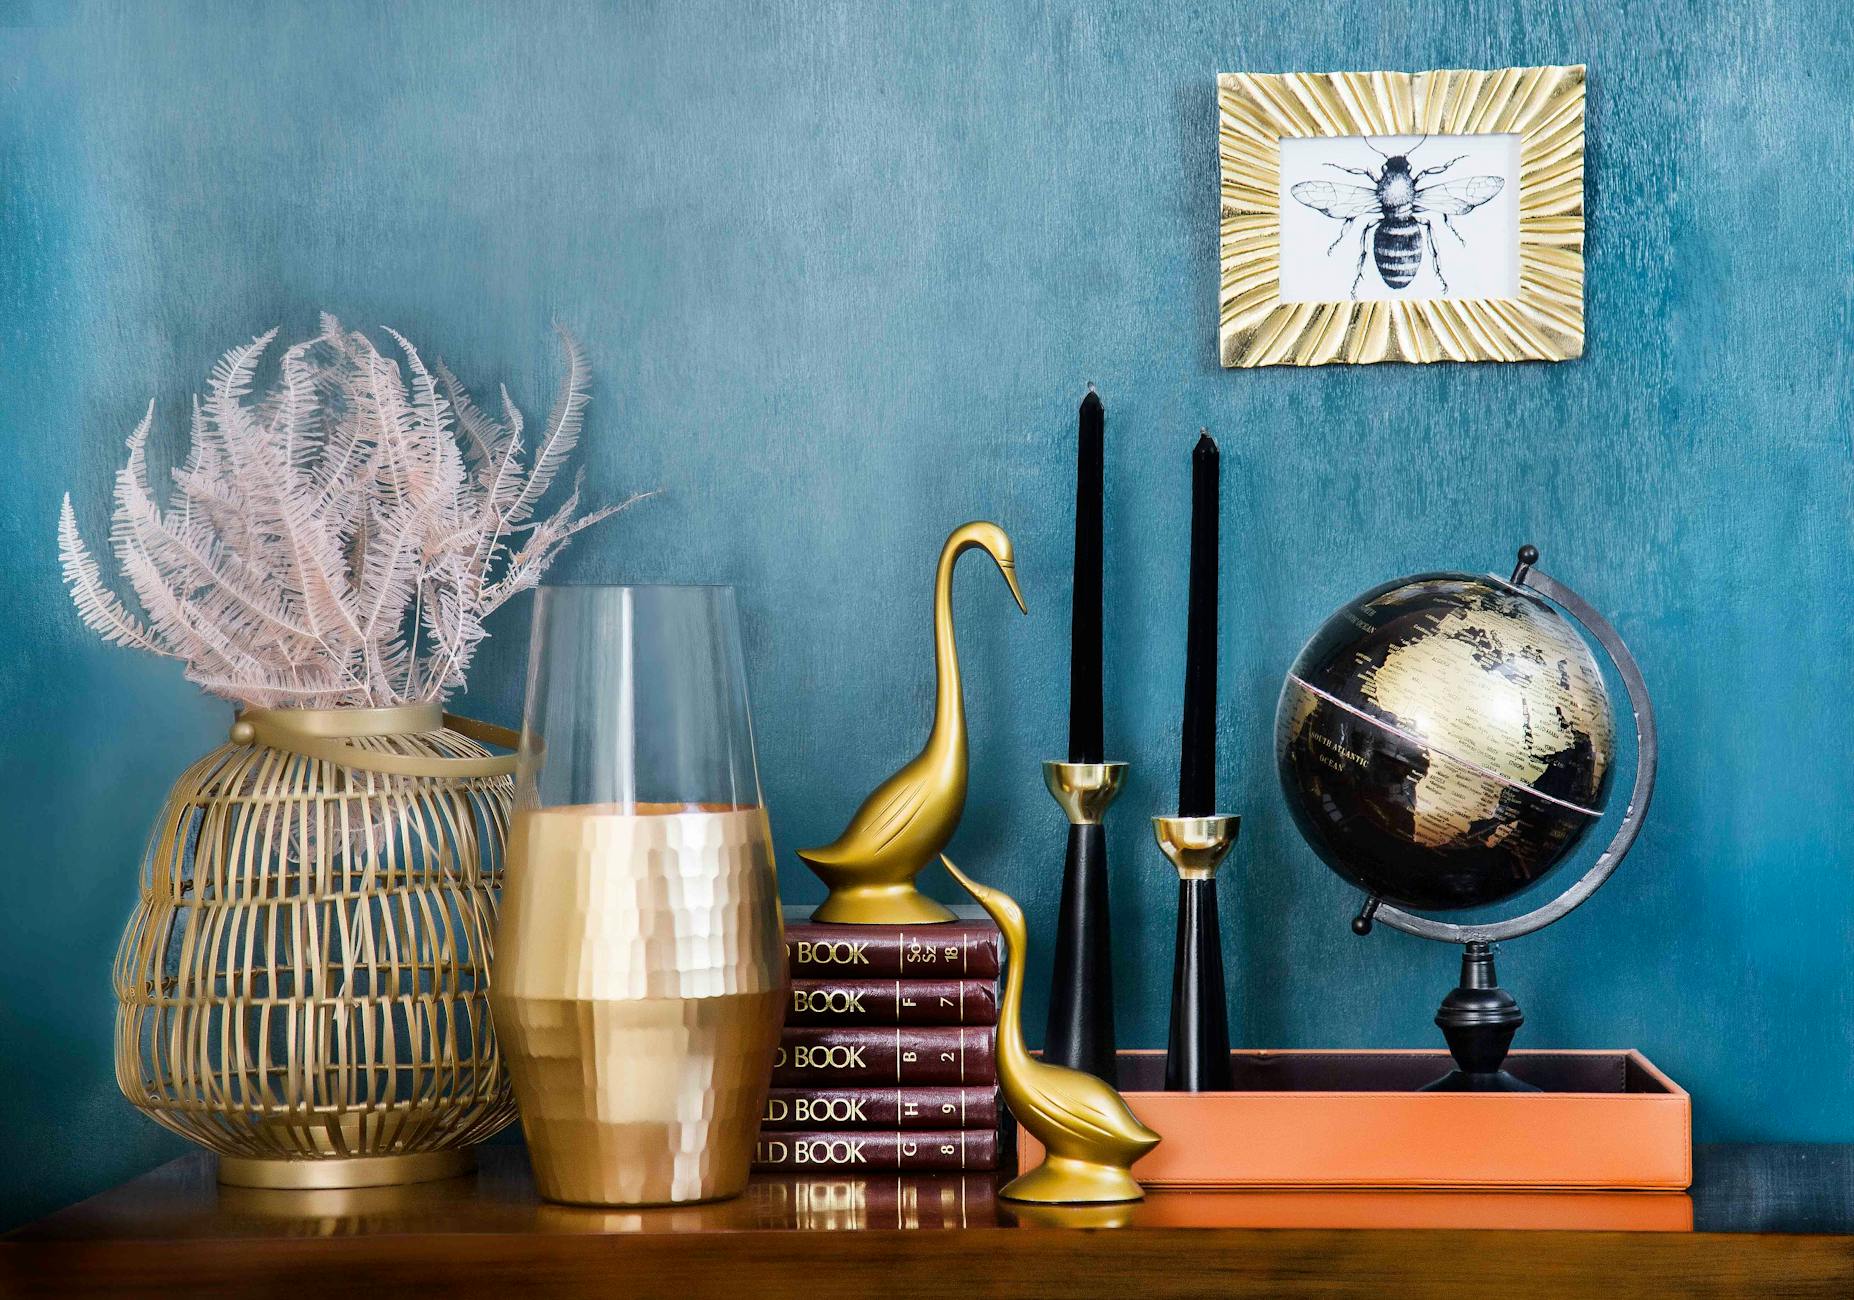
- Symmetrical: Place identical items (e.g., two vases, two candlesticks) on either side of your anchor for a classic, balanced look.
- Asymmetrical: Use items of varying heights and weights, balancing them visually without being identical. For instance, a tall vase on one side might be balanced by a stack of books and a shorter sculpture on the other.
- Natural Elements: Incorporate plants, flowers (fresh or faux), branches, or seasonal foliage to bring life and organic texture to your mantel decor.
- Personal Touches: Display cherished trinkets, travel souvenirs, heirlooms, or framed family photos. These items make your mantel uniquely yours.
- Candles & Lighting: Taper candles, pillar candles, or decorative lanterns can add warmth and ambiance, especially in the evenings.
- Seasonal Updates: Change your mantel decor with the seasons or holidays. Think spring blooms, autumnal gourds, or festive garlands for Christmas.
Remember, less is often more. Avoid overcrowding your mantel. Edit your selections to ensure each piece has room to breathe and contribute to the overall aesthetic.
Kitchen Charm: Inspired by Martha Stewart’s Yellow Kitchen Decor
Martha Stewart yellow kitchen decor evokes a sense of warmth, cheerfulness, and classic elegance. Yellow kitchens are known for being bright and inviting, bringing a sunny disposition into the heart of the home.
To achieve a look reminiscent of Martha Stewart yellow kitchen decor:
- Shades of Yellow: It’s not just one yellow. Consider soft buttery yellows, creamy pale yellows, or even a more vibrant lemon tone for cabinetry or walls. Pair these with crisp white trim or natural wood accents for balance.
- Classic Cabinetry: Opt for traditional cabinet styles like shaker, raised panel, or beadboard. These timeless designs complement the cheerful yellow beautifully.
- Natural Materials: Embrace natural elements such as butcher block countertops, stone tiles, or a classic subway tile backsplash. Martha Stewart’s aesthetic often leans towards authentic, high-quality materials.
- Open Shelving: Incorporate open shelving to display beautiful dishware, glass canisters filled with staples, or decorative cookbooks. This adds a touch of cottage charm and allows for showcasing curated items.
- Vintage Accents: Scout for vintage kitchenware, enamelware, or antique serving pieces. These add character and a sense of history to the space.
- Pops of Color: While yellow is dominant, subtle accents of green (herbs, plants), blue (ceramics), or even touches of polished copper can enhance the color scheme without competing.
- Functional Decor: Think about decorative yet functional items like a classic stand mixer, an attractive set of kitchen utensils in a ceramic crock, or a beautiful fruit bowl always filled with fresh produce.
- Window Treatments: Simple, elegant window treatments like Roman shades or cafe curtains in a coordinating pattern or a neutral fabric will allow plenty of natural light to flood the yellow space.
A kitchen inspired by Martha Stewart yellow kitchen decor is not just about color; it’s about creating a welcoming, functional, and beautifully organized space where cooking and gathering are a joy.
Adding Personality with Paint Wall with Stencils
Using a stencil to paint wall with stencils is an incredibly versatile and cost-effective way to add intricate patterns, textures, and personalized touches to any room. It allows you to achieve the look of wallpaper or custom artwork without the hefty price tag.
- Choosing Your Stencil:
- Pattern Type: From geometric designs, damask, floral, to Moroccan-inspired motifs, the options are vast. Consider the overall style of your room.
- Size: A large, repeating pattern can create a dramatic accent wall, while smaller stencils can be used for borders or subtle details.
- Durability: Reusable plastic stencils are the most common and economical choice.
- Preparing Your Surface: Ensure your wall is clean, dry, and free of dust. A freshly painted base coat in your desired background color is ideal.
- Tools & Materials: You’ll need your stencil, painter’s tape (low tack), a stencil brush or foam roller, a tray for paint, and your chosen paint colors (latex or acrylic works well). A level and a pencil can help ensure straight lines.
- Technique for Success:
- Secure the Stencil: Use painter’s tape to firmly attach the stencil to the wall.
- Minimal Paint: Dip your brush or roller in paint, then blot off excess on a paper towel. This is crucial to prevent bleed-through. You want a relatively dry brush.
- Apply Paint: Use a dabbing or rolling motion, applying thin, even coats. Multiple thin coats are better than one thick coat.
- Peel Carefully: Once the paint is slightly tacky (not fully dry), carefully peel the stencil off the wall. Clean the stencil between applications, especially if changing colors or if there’s significant build-up.
- Repeat: Align the stencil using registration marks (if available) or by eye, then repeat the process.
- Creative Applications:
- Accent Wall: Create a striking feature wall behind a bed or in a dining area.
- Furniture Enhancement: Stencils aren’t just for walls; use them on dressers, tables, or cabinets for a custom look.
- Border or Frieze: Apply a continuous pattern along the top or middle of a wall.
- Textural Effect: Use a tone-on-tone approach (slightly different shades of the same color) to add subtle texture without a bold pattern.
Learning to paint wall with stencils opens up a world of DIY possibilities, allowing you to add unique, customized patterns that truly reflect your personal aesthetic.
Flooring Foundations: Exploring Floor & Decor Tiles and Locations
The right flooring can define a room’s aesthetic and impact its functionality. Floor & Decor is a renowned one-stop shop for hard surface flooring, offering a vast selection of tiles, wood, laminate, and stone. Understanding their offerings and locations can greatly assist in your decorating journey.
- Floor & Decor Tile Variety:
- Ceramic and Porcelain Tile: Incredibly durable and versatile, available in countless colors, patterns, and sizes. Perfect for bathrooms, kitchens, and high-traffic areas. You can find everything from subway tile to large format options.
- Natural Stone Tile: Marble, travertine, granite, and slate offer unparalleled natural beauty and luxury. Each piece is unique.
- Wood Look Tile: Get the aesthetic of hardwood with the durability and water resistance of tile, ideal for any room including bathrooms and kitchens.
- Mosaic Tile: Used for intricate patterns, backsplashes, shower floors, or decorative accents. Available in glass, stone, ceramic, and metal.
- Specialty Tile: Including decorative accents, patterned tiles, and outdoor-specific options.
- Other Flooring Options: Beyond Floor & Decor tile, they also offer hardwood (engineered and solid), laminate, luxury vinyl plank (LVP), and various installation materials and tools.
- Benefits of Shopping at Floor & Decor:
- Vast Selection: Their showrooms are known for extensive displays, allowing you to visualize different styles.
- In-Stock Inventory: Many popular items are in stock, reducing wait times for your project.
- Competitive Pricing: Direct sourcing often means good value.
- Expert Assistance: Sales associates are often knowledgeable about installation and design.
- Finding Floor & Decor Locations: To find a store near you, visit their website and use their store locator. Simply input your zip code or city. They have numerous stores across the United States, making it convenient for many homeowners and professionals to access their wide range of products.
- Considerations: When choosing flooring, think about durability, maintenance, water resistance (especially for bathrooms and kitchens), and how it complements your overall design scheme. Visiting Floor & Decor locations allows you to see and feel the materials firsthand, which is crucial for making an informed decision.
Investing in quality flooring from a reputable supplier like Floor & Decor sets a strong foundation for any interior design project, enhancing both the beauty and longevity of your home.
Celebrating Life’s Moments: Event Decorating Ideas for Every Occasion
Events, big or small, are opportunities to create lasting memories. Decorating for these occasions transforms them from simple gatherings into truly special experiences.
Joyful Beginnings: Charming Baby Shower Decorations
A baby shower is a joyous celebration anticipating a new arrival. The right baby shower decorations create a festive and heartwarming atmosphere for the expectant parents and guests.
- Theme Selection: Start with a theme! Popular ideas include “Twinkle, Twinkle Little Star,” “Oh Boy!” or “Oh Girl!”, woodland creatures, safari, nautical, or a classic pastel color palette. The theme will guide all your other decoration choices.
- Color Palette: Soft pastels (blues, pinks, yellows, greens, lavender) are traditional, but modern showers often incorporate bolder hues, metallics, or gender-neutral palettes like sage green and cream.
- Balloon Arches & Garlands: These are always a hit! Create a stunning focal point with balloons in various sizes and colors, often adorned with greenery or flowers. They make for fantastic photo backdrops.
- Table Centerpieces: Small floral arrangements, cute baby-themed items (e.g., miniature rubber ducks, baby bottles filled with candy), or even small stuffed animals can adorn tables.
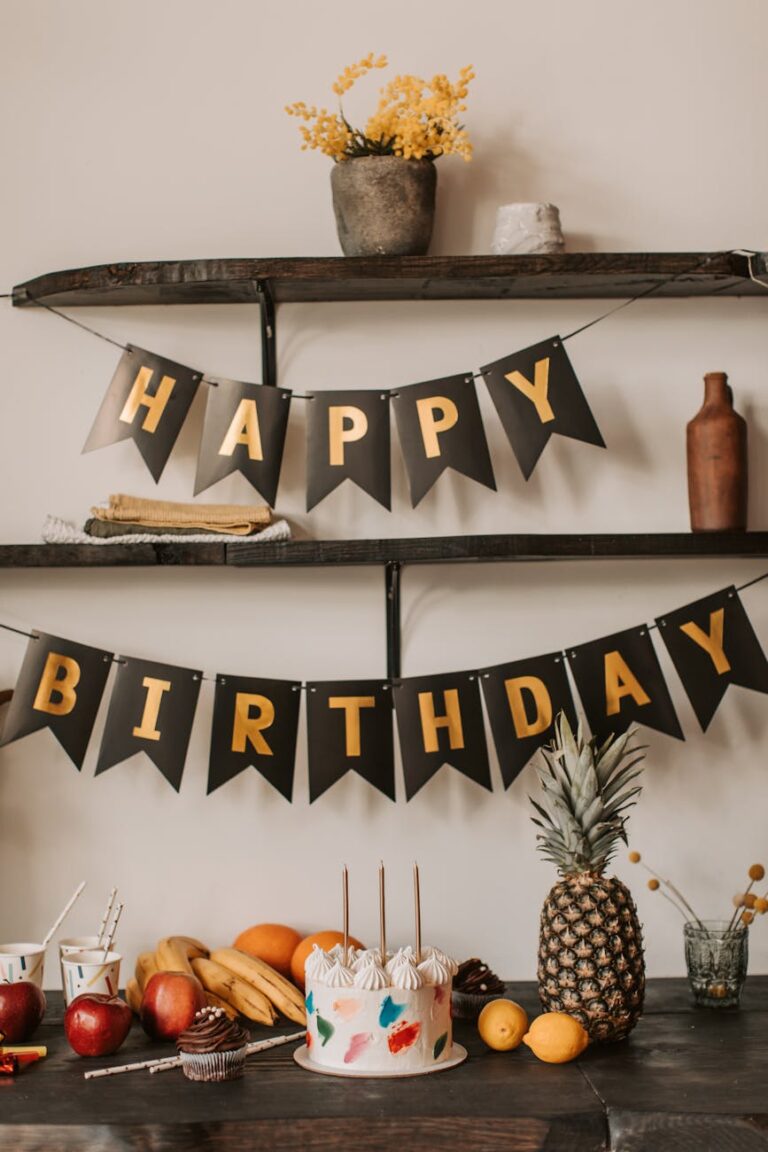
- Banners & Signage: Welcome banners, “It’s a Boy/Girl” signs, or personalized messages add a celebratory touch. DIY banners can be easily made with cardstock and string.
- Diaper Cakes: A decorative and practical gift, diaper cakes can be elaborate centerpieces that also serve as a present.
- Sweet Treats Table: A dedicated dessert table with cupcakes, cookies, and a cake can be beautifully decorated with themed tablecloths, platters, and small decorative items.
- Photo Booth: Set up a simple backdrop with props related to the theme. This encourages guests to capture fun memories.
- Favors: Small, themed favors (e.g., personalized hand sanitizers, seed packets for “Watch Me Grow”) can be charmingly displayed.
- DIY Touches: Handmade onesie banners, painted blocks, or personalized baby items can add a unique and sentimental touch to your baby shower decorations.
Remember to consider the venue and how your baby shower decorations can best utilize the space, creating a cohesive and delightful environment for welcoming the new baby.
Autumnal Delights: Creative Pumpkin Decorating Ideas
As autumn arrives, pumpkins become the quintessential symbol of the season. Beyond traditional carving, there are countless creative pumpkin decorating ideas that can add charm to your home, from subtle elegance to playful whimsy.
- No-Carve Creativity:
- Painted Pumpkins: Use acrylic paints to create solid colors, stripes, polka dots, ombré effects, or even intricate designs. Metallics (gold, silver, copper) can add sophistication.
- Glitter & Glam: Apply adhesive and sprinkle glitter for sparkling pumpkins. Different colors of glitter can create stunning patterns.
- Decoupage: Use Mod Podge to adhere fabric scraps, fall leaves, vintage book pages, or patterned paper napkins to your pumpkins.
- Stenciled Designs: Similar to painting a wall with stencils, use small stencils to add monograms, intricate patterns, or festive words to your pumpkins.
- Embellished Pumpkins: Hot glue lace, ribbons, faux flowers, buttons, sequins, or even thumbtacks (creating geometric patterns) for unique textures and designs.
- Marker Art: Use permanent markers (oil-based are great for darker pumpkins) to draw intricate patterns, mandalas, or spooky faces.
- Yarn-Wrapped: Wrap pumpkins entirely in colorful yarn for a cozy, textural look.
- Natural & Rustic:
- Leaf & Berry Adornments: Use hot glue to attach real or faux autumn leaves, berries, small pinecones, or acorns to your pumpkins.
- Twine & Burlap: Wrap pumpkins with twine or use burlap strips and bows for a rustic, farmhouse-inspired look.
- Themed Pumpkins:
- Character Pumpkins: Paint pumpkins to resemble favorite characters (e.g., a friendly ghost, a black cat, or even a mini Grinch for early Christmas decor!).
- Mummy Pumpkins: Wrap pumpkins in white fabric strips and add googly eyes.
- Display Ideas: Arrange a cluster of decorated pumpkins on your porch, as a table centerpiece, or nestled within a mantel display. Combine various sizes, shapes, and colors for visual interest.
These pumpkin decorating ideas offer a fun and engaging activity for all ages, allowing you to customize your autumn decor to perfectly match your personal style and festive mood.
Festive Fun: Grinch Christmas & Christmas Door Decorations
The holiday season is a magical time for decorating, and incorporating themed elements can make it even more special. From whimsical Grinch Christmas decorations to classic Christmas door decorations, there’s a multitude of ways to spread cheer.
Grinch Christmas Decorations:
Embrace the mischievous spirit of Dr. Seuss’s Grinch for a playful and unique holiday theme.
- Color Palette: Focus on Grinch green, vibrant red, and hints of white.
- Grinch Tree: Decorate your Christmas tree with Grinch-themed ornaments – green bulbs, red and white striped candy canes, and a large red ornament or plush Grinch arm peeking out from the top as if “stealing” the star.
- “Whoville” Elements: Create whimsical, oversized ornaments, signs with curly fonts, and non-traditional shapes. Use bright, unexpected colors alongside the green and red.
- Grinch Signs & Cutouts: Display cutouts of the Grinch, Max the dog, or iconic phrases like “Merry Grinchmas” or “He’s a Mean One.”
- Stolen Gifts: Place empty gift boxes with ribbon tied around them, or even a plush Grinch “stealing” a gift from under the tree, adding a humorous touch.
- Centerpieces: Use green and red flowers, striped candles, and small Grinch figurines for table decor.
- Upside Down Elements: For an extra touch of Grinchy mischief, consider an upside-down mini Christmas tree or ornaments that seem to be falling off shelves.
Christmas Door Decorations:
Your front door is the first impression visitors get during the holidays, making Christmas door decorations essential for setting a festive tone. Drawing inspiration from “How to Hang Outdoor Christmas Garland Around the Front Door” by Abby Lawson, here’s how to create a stunning entryway.
- Wreaths: A classic choice! Opt for a traditional evergreen wreath, or one adorned with berries, pinecones, bows, or even personalized ornaments. You can also craft a whimsical Grinch-themed wreath.
- Garlands: Outdoor Christmas garland around the front door creates an elegant frame.
- Measurement: Measure the top and sides of your door frame, adding extra for draping and fullness.
- Securing the Garland: Use clear outdoor command hooks, brick clips, or permanent eye hooks discreetly placed on the door frame.
- Draping: Start from the top center, letting the garland drape naturally down the sides. Secure it every 1-2 feet.
- Embellishments: Weave in string lights (warm white is classic), add large weatherproof ornaments, bows, faux berries, or even fresh greenery like eucalyptus or cedar for added scent and texture.
- Abby Lawson’s Tip: Ensure your securing points are strong, especially for heavier, pre-lit garlands, to withstand wind and weather. Layering multiple types of garland (e.g., a plain evergreen base with a decorative one on top) can add richness.
- Potted Plants: Flank your door with potted evergreens, small decorated trees, or festive planters filled with poinsettias or winter-blooming flowers.
- Doormats: A holiday-themed doormat can tie all your Christmas door decorations together.
- Lights: Outline your doorframe with outdoor string lights for a welcoming glow.
By combining whimsical Grinch Christmas decorations inside and elegant Christmas door decorations outside, you can create a truly memorable and festive holiday home.
A Cap Above: Personalized Graduation Cap Decoration
Graduation is a momentous occasion, and personalizing your graduation cap decoration is a wonderful way to express your individuality, gratitude, or future aspirations as you cross the stage. It’s a canvas for your creativity and a memorable keepsake.
- Plan Your Design:
- Theme: What message do you want to convey? Gratitude (to family, friends, mentors), future plans (career, travel), school spirit, or a favorite quote.
- Materials: Gather acrylic paints, permanent markers, glitter, rhinestones, faux flowers, fabric, photos, stencils, or even small 3D elements.
- Sketch First: Draw your design on paper first to visualize placement and color scheme.
- Preparing the Cap:
- Work on a Separate Square: It’s easiest to work on a sturdy square of cardstock cut to the exact size of your cap’s top. This way, if you make a mistake, you haven’t ruined your actual cap, and you can easily glue it on top once finished.
- Measure Precisely: Remember that the tassel goes through the center of the cap, so leave a space or incorporate it into your design.
- Popular Decoration Ideas:
- Quotes & Sayings: Inspirational quotes, inside jokes from your college experience, or famous lines related to achievement.
- Future Plans: “Future Doctor,” “Teacher Bound,” a map of where you’re going, or the logo of your future employer.
- Thanks & Dedications: “Thanks Mom & Dad,” “For My Family,” or dedicating your achievement to a specific person.
- School Spirit: Incorporate school colors, mascots, or logos.
- Pop Culture References: Movie quotes, song lyrics, or character themes (e.g., “Oh, the Places You’ll Go!”).
- Floral & Botanical: Adorn with faux flowers, leaves, or a whimsical vine pattern.
- Glitter & Bling: Add sparkle with glitter, rhinestones, or sequins for a glamorous look.
- Photos: Print and attach small, memorable photos of your journey.
- Adhesion & Finishing:
- Glue: Use strong craft glue or hot glue for fabric, rhinestones, and 3D elements.
- Sealant: Consider a clear sealant spray (e.g., Mod Podge sealant) to protect your design from smudging or wear, especially if using paint or markers.
- Considerations: Ensure your graduation cap decoration is not overly bulky or heavy, as it needs to stay securely on your head during the ceremony. Check if your institution has any rules regarding cap decorations.
Your graduation cap decoration is a powerful statement of your journey and hopes, making it a truly personal and memorable part of your graduation day.
Embracing Creativity: DIY & Personal Decorating Journeys
Decorating is a journey, and sometimes the most rewarding projects are those you undertake yourself. The act of creation, whether it’s a small craft or a larger home improvement, allows for ultimate personalization.
Embracing the DIY Spirit: Decora DTI Projects
The phrase “decora DTI” likely refers to “decorate Do It Yourself” or similar creative projects that empower individuals to take decorating into their own hands. Engaging in decora DTI allows for unique expression, budget-friendly solutions, and the immense satisfaction of creating something beautiful.
- Understanding “Decora DTI”: It encompasses a wide range of projects, from simple crafts to more complex home upgrades. The core idea is personal involvement in enhancing your living spaces or event decor.
- Benefits of Decora DTI:
- Personalization: Your creations are unique and perfectly tailored to your taste.
- Cost-Effectiveness: Often, DIY projects are significantly cheaper than purchasing ready-made decor.
- Skill Development: You learn new techniques and develop practical skills.
- Stress Relief & Enjoyment: The creative process can be therapeutic and deeply rewarding.
- Eco-Friendly: Upcycling old items reduces waste and gives them new life.
- Popular Decora DTI Project Categories:
- Wall Art: Create your own canvas paintings, abstract art, framed prints, or even macrame wall hangings.
- Furniture Upcycling: Repaint, distress, or reupholster old furniture pieces to give them a fresh look. (e.g., a new coat of yellow paint for a kitchen island to complement Martha Stewart yellow kitchen decor.)
- Textile Crafts: Sew custom throw pillows, curtains, or even fabric art. Tie-dye blankets or pillowcases.
- Lighting: Customize lampshades, build simple pendant lights, or create decorative string light installations.
- Seasonal & Event Decor: Hand-paint pumpkins, craft your own baby shower decorations from paper, or assemble unique Christmas door decorations.
- Organization Solutions: Build simple shelving, craft decorative storage boxes, or create custom drawer organizers. (This aligns well with Abby Lawson’s focus on organized spaces).
- Outdoor Decor: Paint planters, build a small vertical garden, or create patio lighting.
- Getting Started with Decora DTI:
- Research & Inspiration: Pinterest, YouTube, and DIY blogs are great resources.
- Start Small: Begin with simpler projects to build confidence before tackling larger ones.
- Gather Tools: Invest in basic DIY tools like a hot glue gun, craft knives, various glues, and paintbrushes.
- Patience is Key: Embrace imperfections; they often add character.
Engaging in decora DTI is not just about the finished product; it’s about the journey of creation, learning, and making your space truly your own, often resulting in pieces more cherished than anything store-bought.
Your Personal Decorating Journey: “Decoro” & “Decorarán”
The journey of decorating is deeply personal, reflecting individual tastes, experiences, and aspirations. The Spanish verbs “decoro” (I decorate) and “decorarán” (they will decorate) highlight this personal action and future potential in design.
- “Decoro”: The Act of Personalizing Your Space
When you say “decoro,” you’re actively engaging in the process of shaping your environment. This is about making conscious choices that resonate with you:- Expressing Self: Your decor is an extension of your personality. Do you lean towards minimalist calm, bohemian vibrancy, rustic charm, or classic elegance?
- Creating Comfort: You decorate to make your space comfortable and functional for you and your family.
- Mindful Selection: This involves carefully choosing colors, textures, furniture, and accents that bring you joy and peace.
- Continuous Evolution: Decorating isn’t a one-time event; as your life changes, so too might your decor. It’s an ongoing process of refining and refreshing.
- Hands-On Approach: For many, “decoro” involves DIY projects, crafting, and personal touches that transform a house into a home.
- “Decorarán”: The Future Potential and Collaborative Spirit of Decorating
The phrase “decorarán” speaks to future plans, group efforts, and the professional touch.- Future Projects: “They will decorate” implies upcoming renovations, seasonal updates (like how people decorarán for Christmas each year), or preparing for a new phase of life (e.g., decorating a nursery for a baby).
- Professional Assistance: It can also refer to hiring interior designers or event planners who “will decorate” a space for you, bringing their expertise and vision to life.
- Community & Collaboration: In event planning, like preparing baby shower decorations or setting up for a graduation, friends and family often “will decorate” together, fostering a sense of community and shared effort.
- Seasonal & Trend Forecasting: “They will decorate” can also refer to broader trends that emerge, influencing how people collectively decide to refresh their homes each season or year, inspiring new pumpkin decorating ideas or shifts in color palettes.
- Anticipation and Planning: This phase involves research, gathering inspiration (perhaps from Floor & Decor locations for tiles, or online for a specific aesthetic like Martha Stewart yellow kitchen decor), and making decisions about what the space will become.
Whether you individually “decoro” your space with love and effort, or you look forward to how “decorarán” (they will decorate) a future event or space, both terms encapsulate the dynamic and exciting nature of design. It’s about envisioning beauty and bringing it to fruition, making every space tell a story.
Essential Decorating Tips & Tricks for Every Project
Successful decorating, whether for a cozy nook or a grand event, relies on thoughtful planning and execution. Here are some fundamental tips to guide your creative endeavors.
Planning Your Decor Project for Seamless Execution
Effective planning is the backbone of any successful decorating project. It helps prevent costly mistakes, saves time, and ensures a cohesive outcome.
- Define Your Vision: Before buying anything, clearly articulate what you want the space to look like and how you want it to feel. Create a mood board using physical samples, magazine clippings, or digital images (Pinterest is excellent for this).
- Set a Budget: Determine how much you’re willing to spend. This will influence your material choices (e.g., custom furniture vs. DIY upcycling, designer tiles from Floor & Decor tile vs. more economical options). Stick to it rigorously to avoid overspending. (This ties into Abby Lawson’s practical advice on money routines).
- Measure Everything: This cannot be stressed enough. Measure the room dimensions, wall space for bathroom wall decor or dining room wall decor, window sizes, and the dimensions of any furniture you plan to buy or place. Always measure twice!
- Consider Functionality: How will the space be used? A living room for entertaining will have different needs than one for quiet reading. Ensure your decor choices support the room’s primary purpose.
- Create a Floor Plan: Sketch out your room and arrange furniture layouts. This helps visualize flow and ensures pieces fit without overcrowding. Online tools can assist with this.
- Prioritize: If your budget or time is limited, decide which elements are most important to tackle first. Maybe it’s a new coat of paint, or perhaps a significant piece of furniture.
- Gather Inspiration: Look at magazines, design blogs, social media, and even other homes for ideas. For example, research different pumpkin decorating ideas or methods to paint wall with stencils.
- Timeline: Set realistic deadlines for different phases of your project. This helps you stay on track, especially for event-specific decor like baby shower decorations or Grinch Christmas decorations.
- Material Sourcing: Identify where you will purchase items – local craft stores, furniture outlets, or specialized retailers like Floor & Decor locations for flooring needs.
A well-planned decorating project is a joyful one, leading to beautiful results that you’ll love for years to come.
Budgeting for Beauty: Achieving Style Without Breaking the Bank
Decorating doesn’t have to be expensive. With smart budgeting and creative choices, you can achieve stunning results.
- Prioritize Investments: Decide where to splurge and where to save. For example, you might invest in a durable sofa but find budget-friendly accessories.
- DIY Where Possible: Embrace decora DTI! Painting furniture, crafting your own wall art, or making your own Christmas door decorations can save a significant amount. Learning to paint wall with stencils is a cost-effective way to add pattern.
- Shop Smart:
- Sales & Discounts: Keep an eye out for seasonal sales, clearance events, and discount codes.
- Thrift Stores & Flea Markets: These are treasure troves for unique, vintage pieces that can be upcycled.
- Online Marketplaces: Explore local buy/sell groups or online used item platforms for furniture and decor.
- Wholesale & Outlets: For larger purchases like tiles, explore Floor & Decor tile options which often offer competitive pricing due to their scale.
- Repurpose & Reuse: Look at what you already own with fresh eyes. Can that old dresser be painted for a new look? Can old jars become decorative storage?
- Focus on Impactful Changes: Sometimes, a fresh coat of paint, updated hardware, or a new arrangement of existing items can make a huge difference without a big expense.
- Comparison Shop: Don’t buy the first thing you see. Compare prices from different retailers for similar items.
- Track Your Spending: Keep a detailed record of all purchases to ensure you stay within your allocated budget. This aligns with principles of financial organization, similar to what Abby Lawson shares in “Our Family’s Money Routine.”
- Borrow or Rent: For event-specific items (like large props for baby shower decorations), consider borrowing from friends or renting rather than buying.
Smart budgeting allows you to be more creative and resourceful, proving that beautiful decor is accessible regardless of your financial constraints.
Finding Your Style: Unlocking Your Unique Decorating Aesthetic
Discovering your personal decorating style is key to creating a home that feels authentic and comfortable. It’s a journey of self-discovery as much as it is about design.
- Look Inward: What colors, textures, and patterns are you naturally drawn to in clothing, nature, or art? What makes you feel calm, energized, or happy?
- Gather Inspiration Actively:
- Create a Vision Board: Collect images from magazines, Pinterest, and websites that appeal to you. Don’t overthink it initially; just collect what you love.
- Analyze Your Collections: Once you have a substantial collection, look for common threads. Are there recurring colors, furniture styles, or overall moods? Do you see a lot of Martha Stewart yellow kitchen decor or more minimalist aesthetics?
- Identify Keywords: Start using descriptive words for what you like: “cozy,” “modern,” “rustic,” “glam,” “industrial,” “bohemian,” “classic.”
- Consider Your Existing Home: What elements do you already have that you love? What needs to change?
- Think About Function: How do you live? Your style should support your lifestyle. If you have kids and pets, a highly delicate, formal style might not be practical.
- Visit Showrooms & Stores: Walk through furniture stores, decor shops, and places like Floor & Decor locations. See what catches your eye in real life.
- Experiment with Small Changes: Don’t feel pressured to define your entire style at once. Start with a small area, like your mantel decor or a single wall using a stencil, and see how it feels.
- Don’t Be Afraid to Mix: It’s okay to blend styles! A modern sofa can look great with a vintage coffee table. An eclectic mix often feels more personal and lived-in.
- Trust Your Instincts: Ultimately, if you love it, it’s the right choice for your style. Don’t worry too much about trends if they don’t resonate with you.
Your style will evolve over time, and that’s perfectly normal. The most important thing is that your home feels like you. As you “decoro” your space, you’ll continuously refine and express your unique aesthetic.
Sourcing Materials: From Artisanal Finds to Floor & Decor
Sourcing the right materials is crucial for bringing your decorating vision to life. The choices you make impact not only the aesthetic but also the quality, durability, and cost of your project.
- Local & Small Businesses:
- Artisan Shops: For unique, handmade pieces that add character and support local artists. This can be great for one-of-a-kind bathroom wall decor or bespoke items.
- Thrift Stores & Antique Shops: Excellent for finding vintage furniture to upcycle (perfect for decora DTI projects), unique glassware, or quirky accents.
- Farmers Markets/Nurseries: For fresh flowers, plants, and seasonal items to enhance your mantel decor or table centerpieces.
- Big Box Retailers & Home Improvement Stores:
- Wide Selection: Stores like Floor & Decor offer an extensive range of hard surfaces, including various Floor & Decor tile options, wood, and laminate, along with installation tools and supplies.
- Convenience: Easy access to a broad inventory, often with in-stock options.
- Competitive Pricing: Direct sourcing often means good value.
- Paint & Hardware: Essential for any project, from a fresh coat of paint for walls to new cabinet pulls.
- Online Retailers:
- Vast Choice: Endless options for furniture, lighting, rugs, and decorative accessories.
- Niche Markets: Specialty sites for unique items or specific styles (e.g., bohemian, industrial).
- Comparison Shopping: Easy to compare prices and read reviews.
- Specialty Stores:
- Fabric Stores: For custom curtains, upholstery, or craft projects (e.g., making custom baby shower decorations).
- Craft Stores: Your go-to for DIY supplies, from paints and stencils (for when you paint wall with stencils) to glitter and embellishments for graduation cap decoration or pumpkin decorating ideas.
- Repurposing & Upcycling:
- What You Own: Before buying new, consider if existing items can be repurposed or given a fresh look.
- Nature: Branches, stones, leaves, or pinecones can become free, beautiful decor.
- Friends & Family: Sometimes a friend’s old furniture piece is your next DIY project.
By diversifying your sourcing methods, you can find the perfect combination of unique, budget-friendly, and high-quality materials to bring any decorating vision, from a bright Martha Stewart yellow kitchen decor to elaborate Grinch Christmas decorations, to life.
Frequently Asked Questions About Decorating
Here are some common questions people ask when embarking on decorating projects, providing practical insights and expert advice.
FAQs on Decorating
Q1: How do I start decorating a room from scratch if I have no ideas?
A1: Begin by defining the room’s function and your desired mood. Gather inspiration from magazines, Pinterest, or design blogs, creating a mood board of images you love. Identify a color palette and then select a key piece (like a rug, artwork, or sofa) to build around. Don’t rush; let your vision evolve. For example, if you’re stuck on bathroom wall decor, search for styles you admire and adapt them.
Q2: What’s the best way to incorporate my personal style without making my home look cluttered?
A2: Focus on curation. Choose meaningful pieces rather than too many. Group similar items together (e.g., a collection of travel souvenirs on your mantel decor). Use decorative storage to hide clutter. Embrace negative space; not every surface needs an item. Regularly decluttering (as Abby Lawson emphasizes for organized spaces) is crucial.
Q3: How often should I change my home decor?
A3: There’s no set rule. Most people refresh their decor seasonally, for holidays (like with Grinch Christmas decorations or pumpkin decorating ideas), or every few years to update with trends or personal preferences. Small changes, like new throw pillows or rotating artwork, can make a big difference without a full overhaul.
Q4: Can I mix different decorating styles, and how can I do it successfully?
A4: Absolutely! Mixing styles (e.g., modern and vintage) creates a unique, layered look. The key is to find common elements: a consistent color palette, similar textures, or a unifying material (like wood tones or metal finishes). Ensure there’s a balance; one style shouldn’t completely overpower the other.
Q5: What are some budget-friendly ways to update a room?
A5:
- Paint: A fresh coat of paint or adding an accent wall by learning to paint wall with stencils is transformative.
- Rearrange: Move existing furniture and decor to create a new layout.
- DIY Projects: Upcycle furniture, create your own art (decora DTI).
- New Textiles: Update throw pillows, blankets, or curtains.
- Thrift & Secondhand: Hunt for unique finds at thrift stores or flea markets.
- Lighting: Change light fixtures or add ambient lighting.
Q6: What should I consider when choosing new flooring, like Floor & Decor tile?
A6: When selecting Floor & Decor tile or any flooring, consider:
- Room Function: High-traffic areas need durable materials. Bathrooms and kitchens require water resistance.
- Style & Aesthetic: Does it complement your overall home design?
- Maintenance: How easy is it to clean and maintain?
- Budget: Natural stone is typically more expensive than ceramic or LVP.
- Installation: Will it be a DIY project or professional installation? Visiting Floor & Decor locations allows you to see and feel the options.
Q7: How can I make my small space look larger with decor?
A7:
- Light Colors: Use lighter paint colors and furniture to make walls recede.
- Mirrors: Strategically placed mirrors reflect light and create the illusion of more space (great for dining room wall decor).
- Vertical Lines: Emphasize vertical elements (tall shelves, curtains hung high) to draw the eye upwards.
- Multifunctional Furniture: Choose pieces that serve more than one purpose (e.g., an ottoman with storage).
- Declutter: Keep surfaces clear and minimize unnecessary items.
These FAQs provide practical advice to help you confidently approach your next decorating project, turning your inspirations into beautifully realized spaces.
Conclusion: Your Journey to a Beautifully Decorated Life
From the intimate corners of your home to the grand celebrations of life’s milestones, the power of thoughtful decoration is undeniable. We’ve explored a vibrant spectrum of ideas, from transforming your bathroom wall decor into a serene escape and enhancing your dining room wall decor for memorable gatherings, to embracing the festive spirit with unique pumpkin decorating ideas and whimsical Grinch Christmas decorations.
We’ve delved into the specifics of creating charming baby shower decorations, personalizing your graduation cap decoration, and even bringing a touch of classic elegance with Martha Stewart yellow kitchen decor. The practicality of updating a space by learning to paint wall with stencils and understanding the extensive options at Floor & Decor locations for their diverse Floor & Decor tile has also been highlighted.
The journey of decorating is deeply personal, embodied by the phrases “decoro” (I decorate) and “decorarán” (they will decorate), reflecting individual creativity and collective celebration. Whether you are seeking inspiration for your mantel decor or embarking on a full-scale decora DTI project, the principles of planning, budgeting, and finding your unique style remain paramount.
Remember, decorating is not just about aesthetics; it’s about crafting environments that nurture, inspire, and bring joy. It’s about creating beautiful, organized spaces where you and your family can thrive, as suggested by the philosophy of Abby Lawson. So, unleash your creativity, experiment with these ideas, and enjoy the transformative magic of decor. Your beautifully decorated life awaits!