Inspiring Home and Event Decor Ideas
Transform Your Space: A Comprehensive Guide to Inspiring Home & Event Decor Ideas
Estimated reading time: Approximately 24 minutes
Key Takeaways
- Decorating transforms spaces into reflections of personality, creating atmosphere for cherished memories.
- Home decor involves thoughtful details from bathroom and dining room walls to mantel styling, using techniques like stenciling and embracing classic looks like Martha Stewart’s yellow kitchen.
- Event and seasonal decor, including baby showers, pumpkin designs, Grinch themes, and Christmas door decorations, personalize celebrations.
- Sourcing materials from places like Floor & Decor and engaging in DIY “Decora DTI” projects are key for successful and unique decor.
- Graduation cap decoration offers a personal triumph, allowing graduates to express their unique journey.
Table of Contents
- Introduction: The Art of Transformation – Unleashing Your Inner Decorator
- 1. Elevating Everyday Spaces: Home Decor with Personality
- 2. Celebrating Special Moments: Event & Seasonal Decor
- 3. Sourcing & Inspiration: Practical Elements for Your Decor Journey
- Frequently Asked Questions (FAQs)
- Conclusion: Your Journey, Your Decor
Introduction: The Art of Transformation – Unleashing Your Inner Decorator
Every space tells a story, and with a touch of creativity and thoughtful design, you have the power to write its next captivating chapter. Whether you’re envisioning a serene sanctuary in your bathroom, a festive explosion for the holidays, or a personalized touch for a special milestone, decorating is an art form that transforms the mundane into the magnificent. It’s about expressing personality, creating atmosphere, and crafting environments where memories are made and cherished.
In this ultimate guide, we invite you to embark on an inspiring journey through a diverse world of decorating possibilities. We’ll explore innovative bathroom wall decor ideas to elevate your daily routine, sophisticated approaches to dining room wall decor that set the perfect mood for gatherings, and enchanting concepts for mantel decor that anchor any room. Beyond everyday elegance, we’ll dive into the joyous realm of event and seasonal decorating, from heartwarming baby shower decorations and charming pumpkin decorating ideas to spirited Grinch Christmas decorations and welcoming Christmas door decorations. We’ll even guide you through personalizing a graduation cap decoration to celebrate achievement.
But the inspiration doesn’t stop there. We’ll unearth the timeless appeal of Martha Stewart yellow kitchen decor, unlock the potential of paint wall with stencils for unique finishes, and offer practical insights into finding your perfect materials at Floor & Decor locations, exploring their versatile floor and decor tile options. We’ll even touch upon creative DIY decora DTI projects that add a touch of industrial chic and personal flair.
Prepare to ignite your imagination, armed with practical tips, creative concepts, and the confidence to decorate every corner of your world. Let’s create beautiful, organized, and truly personalized spaces where you and your family can thrive!
1. Elevating Everyday Spaces: Home Decor with Personality
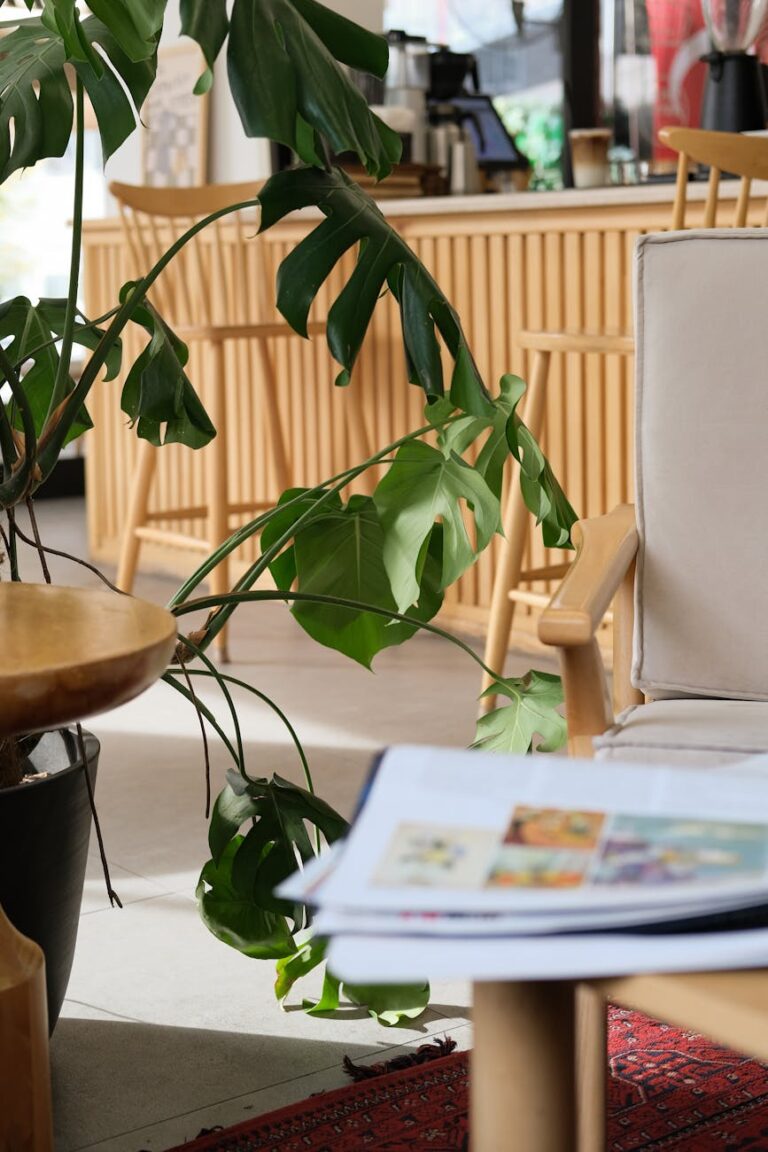
Your home is your sanctuary, a reflection of your style and a backdrop for your life. Making it beautiful and functional doesn’t require a complete overhaul; often, it’s the thoughtful details and creative touches that make all the difference.
1.1. Bathroom Wall Decor: Crafting a Personal Oasis
The bathroom, often overlooked, holds immense potential as a space for relaxation and rejuvenation. Thoughtful bathroom wall decor can transform it from a purely functional area into a spa-like retreat or a vibrant design statement.
1.1.1. Themes and Styles for Your Bathroom Walls
- Minimalist Serenity: Embrace clean lines and muted colors. Think large format tiles, simple framed botanical prints, or abstract art in a monochrome palette. Open shelving with neatly folded towels and a single sculptural plant adds to the calm.
- Coastal Calm: Bring the beach indoors with shades of blue, green, and sand. Driftwood mirrors, seashell art, or prints of seascapes can create a tranquil, airy feel. Consider a shiplap accent wall for added texture.
- Modern Farmhouse: Blend rustic charm with contemporary touches. A wooden ladder shelf, distressed metal accents, and black and white prints of farm animals or vintage signs can create a cozy yet chic atmosphere. A brick-effect wallpaper or a textured tile can enhance this look.
- Bohemian Rhapsody: Introduce vibrant patterns, global textiles, and natural elements. Macrame wall hangings, colorful woven baskets, and eclectic mirrors with unique frames can infuse a bohemian spirit. Don’t shy away from mixing patterns and textures.
- Industrial Edge: For a more urban feel, incorporate elements like exposed brick wallpaper, metal shelving, and minimalist geometric art. Darker tiles or concrete finishes can complete this modern, edgy look.
1.1.2. Material Matters: Beyond Paint
While a fresh coat of paint is always a good starting point, consider these materials for adding depth and character:
- Wallpaper: Modern wallpapers are water-resistant and come in an incredible array of patterns and textures. From subtle geometrics to bold florals, wallpaper can make a dramatic statement on an accent wall.
- Tiles: Ceramic, porcelain, or natural stone tiles are not just for showers and floors. A feature wall tiled in an interesting pattern (herringbone, chevron) or a unique color can elevate the entire room. Penny tiles or subway tiles offer classic appeal, while large format tiles create a sleek, contemporary look.
- Wood Paneling/Shiplap: Adds warmth and texture, especially suitable for farmhouse or coastal aesthetics. Ensure it’s properly sealed for bathroom environments.
- Mirrors: More than functional, mirrors can be decorative elements. A large, ornate mirror or a collection of smaller, uniquely framed mirrors can reflect light and expand the sense of space.
- Floating Shelves: Provide practical storage for toiletries and display space for small plants, candles, or decorative objects. Choose materials that complement your overall theme.
1.1.3. DIY Touches and Accessories
- Gallery Wall: Curate a collection of framed art, photos, or even vintage botanical prints. Vary frame sizes and styles for an eclectic look, or keep them uniform for a cohesive display.
- Art Prints: Waterproof art prints or canvas art can add color and personality. Opt for themes that evoke calm or inspiration.
- Wall Decals: A temporary and affordable way to add flair, from quotes to intricate patterns.
- Textile Accents: High-quality towels, bath mats, and even a small fabric shower curtain can contribute to the overall decor.
- Greenery: Live plants (ferns, snake plants, pothos) thrive in bathroom humidity and add a touch of nature. Small wall-mounted planters can save space.
- Lighting: Beyond basic vanity lights, consider adding wall sconces or even a small chandelier for ambient lighting that enhances the mood.
1.2. Dining Room Wall Decor: Setting the Scene for Connection
The dining room is often the heart of home gatherings, a place for sharing meals, stories, and laughter. The right dining room wall decor can transform this space into an inviting haven that reflects your personal style and enhances the dining experience.
1.2.1. Art as the Centerpiece
- Large-Scale Art: A single, oversized piece of art can serve as a dramatic focal point, setting the tone for the entire room. Choose a piece that resonates with your aesthetic, whether abstract, landscape, or figurative.
- Gallery Wall: Curate a collection of framed prints, photographs, or mirrors. A well-arranged gallery wall adds visual interest and allows for personal storytelling. Consider a cohesive color scheme or theme, or mix styles for an eclectic vibe.
- Murals or Wallpapers: A captivating mural or a luxurious patterned wallpaper on an accent wall can create a sophisticated backdrop. From scenic landscapes to modern geometric designs, the options are endless.
1.2.2. Mirrors: Expanding Space and Light
- Statement Mirror: A grand, ornate mirror or a sunburst mirror can be both decorative and functional. Mirrors reflect light, making the dining room feel larger and brighter, and add a touch of glamour.
- Mirror Clusters: Group several smaller mirrors of varying shapes and sizes for a unique wall display that bounces light around the room.
1.2.3. Functional and Decorative Elements
- Shelving: Floating shelves or open bookcases can display treasured dishware, cookbooks, plants, or decorative objects. This adds personality and storage without cluttering the main dining area.
- Plate Walls: A classic and charming way to display antique or decorative plates. Arrange them in a symmetrical pattern or a more organic cluster.
- Textile Wall Hangings: Macrame, tapestries, or framed textiles can add softness, texture, and global flair to your dining room.
- Built-in Cabinetry: Custom built-ins provide elegant storage for fine china and linens, and their upper sections can be styled with decorative items or even integrated lighting.
- Architectural Details: Consider adding wainscoting, crown molding, or even decorative wall panels to enhance the room’s character and provide a sophisticated backdrop.
- Lighting as Art: Don’t forget wall sconces! Beyond chandeliers, wall-mounted fixtures can provide accent lighting, highlight artwork, and contribute to the overall aesthetic.
1.2.4. Color and Texture
- Accent Wall: A bold paint color on one wall can inject drama and define the dining area.
- Textured Paint/Plaster: Experiment with Venetian plaster, limewash paint, or textured wallpaper to add depth and tactile interest to your walls.
- Color Palette: Harmonize your wall decor with your dining furniture and accessories. A cohesive color palette creates a polished and inviting atmosphere.
1.3. Mantel Decor: The Heart of the Hearth
The mantelpiece is a natural focal point in any room fortunate enough to have a fireplace. It’s a prime stage for showcasing your style, personality, and seasonal spirit. Thoughtful mantel decor can anchor your room, drawing the eye and creating a sense of warmth and welcome.
1.3.1. The Art of Layering: A Step-by-Step Approach
- The Anchor Piece: Start with a central, impactful item. This could be a large piece of art, a significant mirror, a framed TV, or a substantial clock. It establishes the scale and mood.
- Asymmetrical Balance: While symmetry can be elegant, an asymmetrical arrangement often feels more natural and dynamic. Balance heavier items with lighter ones, and taller pieces with shorter ones.
- Varying Heights: Introduce objects of different heights to create visual interest. Tapered candlesticks, stacked books, vases, or sculptural objects can add vertical dimension.
- Texture and Material Mix: Combine different materials for depth. Think about mixing metal, wood, ceramic, glass, and natural elements like stone or foliage.
- Layering in Front: Don’t just arrange items side-by-side. Layer smaller items in front of larger ones to create depth and a curated look. For example, a small framed photo might sit in front of a larger vase.
- Embrace Negative Space: Don’t overcrowd your mantel. Allow for some empty space around your decor to let each piece breathe and stand out.
1.3.2. Seasonal Transformations
- Spring: Fresh flowers, pastel colors, bird motifs, light greenery, and perhaps a mirror adorned with delicate floral garlands.
- Summer: Coastal elements like seashells, coral, blue and white ceramics, vibrant potted plants, and light, airy fabrics.
- Autumn: Pumpkins, gourds, fall foliage, candles, rustic wood elements, and warm earth tones. A beautiful fall wreath often complements the mantel.
- Winter/Christmas: Garlands (often incorporating the advice from Abby Lawson’s approach to hanging outdoor garlands, scaled for indoors), twinkling lights, festive ornaments, candles, miniature trees, and stockings. This is where Christmas door decorations can inspire indoor displays too.
1.3.3. Everyday Mantel Styling Tips
- Personal Touches: Incorporate items that hold personal meaning – family photos, cherished souvenirs, or handcrafted pieces.
- Books: A stack of beautifully bound books can add intellectual charm and provide a platform for smaller decor items.
- Candles: Always a classic. Grouped candles of varying heights add warmth and ambiance, especially in the evenings.
- Greenery: A trailing plant, a vase of fresh flowers, or a simple leafy garland can bring life and freshness to your mantel throughout the year.
- Collections: If you collect small items (e.g., miniature sculptures, unique vases), the mantel is a perfect place to display a curated selection.
1.4. Paint Wall with Stencils: Personalized Panache
Want to add a unique, custom touch to your walls without the expense of wallpaper or the commitment of a mural? Learning to paint wall with stencils is an accessible and incredibly versatile technique that allows you to infuse patterns, motifs, and personalized designs into any room.
1.4.1. Choosing the Right Stencil and Location
- Pattern and Scale: Consider the size of your room and the effect you want to achieve. Large, bold patterns work well in spacious areas or as a dramatic accent. Smaller, intricate patterns are great for subtle texture or feature walls.
- Design Style: Stencils come in an endless variety: geometric, floral, damask, Moroccan, art deco, tribal, or even custom designs. Choose a pattern that complements your existing decor style.
- Location:
- Accent Wall: Stenciling one wall is a popular way to make a statement without overwhelming the room.
- All Walls: For a wallpaper-like effect, choose a subtle, repeating pattern.
- Borders: A stenciled border around the top of the wall or around architectural features can add a sophisticated detail.
- Furniture/Floors: Don’t limit stenciling to walls! You can revitalize old furniture, create a faux rug effect on a wooden floor, or add details to textiles.
1.4.2. Essential Tools and Materials
- Stencil: Choose a durable Mylar stencil for reusability.
- Paint: Latex paint for walls, or acrylic/chalk paint for furniture. Use a paint color that contrasts enough with your base coat to be visible, but not so much that it’s jarring. Consider a tone-on-tone effect for subtle elegance.
- Stencil Brush or Roller: A dense foam roller or a good quality stencil brush is key for clean lines and preventing bleed.
- Painter’s Tape: Low-tack painter’s tape to secure the stencil.
- Level and Ruler: For accurate placement and straight lines.
- Paper Towels/Rag: To offload excess paint from your brush/roller.
- Spray Adhesive (Optional): A repositionable spray adhesive can help hold the stencil flat, especially on textured walls, reducing paint bleed.
1.4.3. Stenciling Techniques for Flawless Results
- Prepare Your Surface: Ensure the wall is clean, dry, and free of dust. If repainting, allow the base coat to fully cure (usually 24-48 hours).
- Plan Your Layout: Before you start, measure and mark where you want your stencil to begin. Use a level to ensure the first placement is straight, as this will guide subsequent repetitions.
- Secure the Stencil: Use painter’s tape around the edges. If using spray adhesive, apply a light, even coat to the back of the stencil, let it get tacky for a minute, then press it firmly onto the wall.
- Load and Offload Paint: This is crucial! Dip your stencil brush or roller into a small amount of paint, then blot almost all of it off onto a paper towel. You want the brush/roller to be nearly dry. This prevents paint from seeping under the stencil.
- Apply Paint:
- Brush: Use a dabbing or stippling motion (up and down), working from the edge of the design inwards. Avoid brushing sideways, which can push paint under the stencil.
- Roller: Roll over the stencil with light to medium pressure. Ensure even coverage without oversaturating.
- Repeat the Process: Carefully peel off the stencil. If you’re doing a repeating pattern, align the registration marks on the stencil with the previously painted design. Clean your stencil regularly (every 2-3 repetitions for rollers, or more for brushes) to prevent paint buildup and ensure crisp lines.
- Touch-Ups: Don’t worry if there are small bleeds or imperfections. These can be carefully touched up with a fine artist’s brush and your base wall color once the stenciled paint is dry.
1.5. Martha Stewart Yellow Kitchen Decor: Sunny & Sophisticated
Martha Stewart yellow kitchen decor embodies a timeless elegance, blending classic charm with a cheerful, inviting atmosphere. Yellow, often associated with happiness and warmth, can transform a kitchen into a bright, welcoming hub, echoing Martha Stewart’s signature style of refined comfort and practical beauty.
1.5.1. The Psychology of Yellow in the Kitchen
Yellow is known to stimulate appetite and conversation, making it an ideal choice for a kitchen where family and friends gather.
- Soft Pastels: Muted buttery yellows or creamy pale yellows create a gentle, airy feel, perfect for a vintage or cottage-style kitchen.
- Vibrant Hues: Brighter lemon or golden yellows infuse energy and a contemporary pop, especially when balanced with crisp whites or grays.
- Deep Mustards: More sophisticated and earthy, deep mustards work well in kitchens with natural wood tones, traditional cabinetry, or industrial accents.
1.5.2. Key Elements of Martha Stewart’s Yellow Kitchen Aesthetic
- Classic Cabinetry: Often features shaker-style cabinets or traditional raised panel doors. White or cream cabinets provide a beautiful contrast to yellow walls or accents, while a soft yellow on the cabinets themselves can create a cheerful, uniform look.
- Natural Materials: Wood countertops (butcher block), marble, or soapstone add an organic, luxurious touch. Terracotta tiles or checkerboard floors complement the warmth of yellow.
- Open Shelving: A Martha Stewart staple, open shelving displays beautiful dishware, glassware, and culinary collections, adding visual interest and making the kitchen feel more accessible.
- Farmhouse Sink: A large, practical, and aesthetically pleasing element that fits perfectly with the inviting, utilitarian aspect of her style.
- Polished Hardware: Brass, polished chrome, or brushed nickel hardware on cabinets and drawers adds a touch of sophistication and sparkle.
- Abundant Natural Light: Yellow thrives in natural light, amplifying its warmth and brightness. Large windows are key.
1.5.3. Incorporating Yellow Through Accents and Details
If an all-yellow kitchen feels too bold, integrate the color through strategic accents:
- Wall Paint: A pale yellow on the walls can instantly brighten the space without overwhelming it, especially when paired with white cabinetry.
- Backsplash: Yellow subway tiles, mosaic tiles, or even a yellow-patterned tile can add a pop of color behind the stove or sink.
- Textiles: Yellow dish towels, curtains, placemats, or chair cushions can easily introduce the color and be changed seasonally.
- Kitchenware: Display yellow Le Creuset pots, ceramic mixing bowls, or vintage glassware on open shelves or countertops.
- Fresh Produce: A bowl of lemons or bananas naturally brings a touch of vibrant yellow to your countertop, adding freshness and life.
- Flowers: Sunflowers or yellow tulips in a vase add a cheerful, organic element.
- Lighting Fixtures: A pendant light with a yellow shade or a fixture with brass accents can tie into the yellow theme.
- Artwork: Framed prints featuring yellow flowers, fruits, or abstract designs can subtly introduce the color.
2. Celebrating Special Moments: Event & Seasonal Decor
Life is full of occasions worth celebrating, and nothing sets the mood quite like thoughtful, themed decorations. From welcoming new life to festive holiday cheer, these ideas will help you make every event unforgettable.
2.1. Baby Shower Decorations: Welcoming a New Chapter
A baby shower is a joyous occasion, marking the impending arrival of a new little one. The right baby shower decorations create a festive, loving atmosphere that celebrates the parents-to-be and their upcoming journey.
2.1.1. Choosing a Theme and Color Palette
- Classic & Sweet: Pastel blues, pinks, greens, and yellows remain timeless. Themes like “Twinkle Twinkle Little Star,” “Oh Boy/Girl,” or “Welcome Baby” are always popular.
- Nature-Inspired: “Woodland Creatures,” “Baby Safari,” or “Enchanted Forest” themes often incorporate earthy tones, leafy garlands, and cute animal figures.
- Storybook Chic: “Once Upon a Time,” “Peter Rabbit,” or “Winnie the Pooh” themes bring a whimsical, nostalgic charm.
- Modern & Minimalist: Clean lines, neutral colors (grays, whites, creams, muted pastels), and simple elegant touches for a sophisticated feel.
- Boho Baby: Macrame, pampas grass, dreamcatchers, and earthy tones with pops of blush or sage.
2.1.2. Must-Have Decor Elements
- Balloon Arches/Garlands: A popular and impactful way to create a festive backdrop, often used over a dessert table or entrance. Mix balloon sizes and colors to match your theme.
- Backdrop for Photos: A dedicated photo area is essential. This can be a flower wall, a shiplap wall with a custom sign, a balloon arch, or a simple curtain draped with fairy lights.
- Table Centerpieces:
- Diaper Cakes: Both decorative and practical, a beautifully arranged diaper cake makes a fantastic centerpiece.
- Floral Arrangements: Fresh or faux flowers in theme colors.
- Themed Figurines: Small animals, baby blocks, or storybook characters.
- Banners and Signs: “Welcome Baby,” “It’s a Boy/Girl,” or personalized banners with the baby’s name (if known) add a custom touch. Chalkboards or framed prints can announce details.
- Confetti & Streamers: Easy ways to add an instant celebratory feel to tables and the room.
- Themed Tableware: Plates, cups, and napkins that match your chosen theme and color scheme.
- Favors Table: Decorate a separate table for guest favors, often with small personalized gifts.
- Mom-to-Be’s Chair: Designate a special, decorated chair for the guest of honor, perhaps with a sash, ribbons, or floral accents.
2.1.3. Creative DIY Touches
- Paper Lanterns: Hang lanterns in various sizes and colors from the ceiling for a whimsical effect.
- Tissue Paper Pom-Poms: An inexpensive way to add pops of color and texture.
- Clothesline Display: String up tiny baby clothes, socks, or even ultrasound photos on a clothesline for a sweet and personal decoration.
- Custom Labels: Create personalized labels for water bottles, food items, or favor bags.
- “Guess the Baby” Games: Incorporate interactive games into your decor, like a “wishes for baby” station or a “guess the birth date” calendar.
- Fairy Lights: Drape warm fairy lights around backdrops, tables, or entryways for a magical glow, especially if the shower extends into the evening.
2.2. Pumpkin Decorating Ideas: Autumnal Charm Unleashed
As autumn arrives, pumpkins become the quintessential symbol of the season. Beyond traditional carving, there’s a world of creative pumpkin decorating ideas that can transform these gourds into stunning centerpieces, charming porch displays, or elegant home accents.
2.2.1. No-Carve Pumpkin Creations
No-carve options are fantastic for longevity, safety, and endless creativity:
- Painted Pumpkins:
- Solid Colors: White, gold, silver, black, or pastel colors offer a chic, modern look.
- Ombre/Gradient: Paint pumpkins with a gradient of colors for a sophisticated touch.
- Geometric Patterns: Use painter’s tape to create stripes, chevrons, or polka dots.
- Abstract Swirls: Marbleize pumpkins by swirling different paint colors in water and dipping the pumpkin.
- Glitter: Apply spray adhesive and sprinkle with glitter for a dazzling effect.
- Chalkboard Paint: Paint pumpkins with chalkboard paint to write messages or draw designs.
- Embellished Pumpkins:
- Glued Elements: Attach lace, ribbons, sequins, buttons, faux flowers, faux leaves, or rhinestones using craft glue.
- Decoupage: Use Mod Podge to apply fabric scraps, comic book pages, old maps, or botanical prints onto pumpkins.
- Stenciled Designs: Use stencils (similar to paint wall with stencils techniques) with spray paint or acrylics for intricate patterns.
- Wrapped Pumpkins: Wrap with yarn, twine, or fabric strips for a textural look.
- Succulent Toppers: Hollow out a small dip on the top, add some moss, and nestle small succulents for a living centerpiece.
- Melted Crayon Pumpkins: Place crayon pieces on top of a pumpkin and use a hairdryer to melt them, creating colorful drips.
2.2.2. Traditional Carving with a Twist
If you love the classic carved pumpkin, consider these enhancements:
- Glow-in-the-Dark Paint: Outline carved features with glow-in-the-dark paint for an extra spooky effect.
- Mini Scenes: Carve a small opening and create a miniature diorama inside with fairy lights and tiny figures.
- Unusual Tools: Experiment with cookie cutters, drills (for polka dot patterns), or clay sculpting tools for unique designs.
- Multiple Pumpkins: Carve a series of pumpkins that tell a story or feature progressive designs.
2.2.3. Display Ideas
- Porch Scape: Arrange various sizes and types of pumpkins with corn stalks, hay bales, mums, and lanterns.
- Table Centerpiece: Combine decorated pumpkins with autumn leaves, candles, pinecones, and berries.
- Mantel Display: Integrate smaller decorated pumpkins with your existing mantel decor for a seasonal touch.
- Indoor Groupings: Cluster pumpkins on a console table, bookshelf, or windowsill.
- Tiered Trays: Arrange mini pumpkins on a tiered serving tray with other fall-themed items.
2.3. Christmas Door Decorations: A Grand Welcome
The front door is the first impression your home makes during the festive season. Christmas door decorations offer a delightful way to spread holiday cheer and create a warm welcome for guests.
2.3.1. The Classic Christmas Wreath
- Traditional Greenery: A lush wreath of fresh evergreen, pine, or cedar adorned with red berries, pinecones, and a classic red velvet bow.
- Modern Twist: Opt for minimalist wreaths with geometric shapes, metallic finishes, or unexpected materials like felt balls, yarn, or dried fruit.
- Personalized Wreaths: Add monograms, family photos, or small ornaments that reflect your family’s interests.
- Beyond Round: Explore square, rectangular, or even star-shaped wreaths for a unique look.
2.3.2. Elegant Garlands and Swags
- Around the Doorframe: Garlands draped around the entire doorframe create a truly grand entrance. For tips on how to hang outdoor Christmas garland securely and beautifully, consider the advice from Abby Lawson’s blog, which often emphasizes symmetry and sturdy attachment points to withstand weather. She suggests using command hooks, outdoor-rated clips, or even drilling discreet holes for heavy-duty hanging. Layering different types of greenery and incorporating lights and ornaments will enhance the effect.
- Swags: A simpler alternative, a swag is a smaller arrangement of greenery and embellishments that can hang vertically or horizontally across the door.
- Material Mix: Combine evergreen garlands with eucalyptus, magnolia leaves, faux snow, or ribbons for added texture and color.
2.3.3. Lighting Up the Entryway
- Fairy Lights: Wrap strands of warm white or colorful fairy lights around wreaths, garlands, or even a small potted tree next to the door.
- Lanterns: Place decorative lanterns with LED candles on either side of the door or hanging from hooks for a soft, inviting glow.
- Spotlights: Use outdoor spotlights to highlight your wreath or garland, making it visible even from a distance.
2.3.4. Creative Additions
- Door Mats: A festive “Merry Christmas” or themed door mat instantly adds cheer.
- Oversized Ornaments: Hang large, shatterproof ornaments from the top of the doorframe or directly on the door.
- Ribbons and Bows: Drape wide ribbons vertically down the door, secured at the top and bottom, then tie a large bow in the center.
- Small Potted Trees: Place miniature evergreen trees in decorative pots on either side of the door, adorned with lights and small ornaments.
- Themed Elements: If you have a specific theme (e.g., snowman, reindeer, Grinch Christmas decorations), incorporate those elements into your door decor.
2.3.5. Practical Tips for Outdoor Decor
- Weather Resistance: Choose outdoor-rated lights, sturdy materials, and ensure everything is securely fastened to withstand wind and rain.
- Power Source: Plan for outdoor outlets or consider battery-operated lights with timers.
- Maintenance: Check lights periodically and remove any dead foliage from fresh garlands to keep your display looking its best.
2.4. Grinch Christmas Decorations: Whimsical & Fun
For those who love a dash of mischievous charm during the holidays, Grinch Christmas decorations offer a wonderfully whimsical and memorable theme. It’s about celebrating the iconic Dr. Seuss character and his journey from grouch to glee, bringing humor and a vibrant color palette to your festive displays.
2.4.1. The Grinch Aesthetic: Color and Key Elements
- Signature Colors: The primary colors are Grinch green, Whoville red, and pops of white, black, and maybe some yellow or fuchsia.
- Whimsical Shapes: Think exaggerated curves, wonky lines, and oversized elements that evoke the quirky world of Whoville.
- Heart Motif: The Grinch’s growing heart is central to the story, so incorporate heart shapes, especially when illustrating his transformation.
- Cindy Lou Who: Include elements referencing the sweet innocence of Cindy Lou Who for contrast and charm.
- Max the Dog: Don’t forget the loyal sidekick, Max, perhaps with a single reindeer antler.
2.4.2. Grinch Decor Ideas for Every Corner
- Grinch-Themed Christmas Tree:
- Grinch-Stealing-Star: Position the tree topper (star or angel) off-center, as if the Grinch is pulling it away.
- Grinch Legs: Create “Grinch legs” sticking out from the bottom of the tree, perhaps wearing striped socks.
- Ornaments: Green, red, and white ornaments. Incorporate Grinch face ornaments, Whoville character ornaments, or small, quirky DIY ornaments.
- Garlands: Red and white striped garlands, or green tinsel.
- Entryway and Door Decor:
- Grinch Wreath: Craft a wreath with green mesh, red ornaments, and a pair of Grinch hands reaching in.
- Door Decals: A large Grinch decal peeking from behind the door or attempting to steal gifts.
- Welcome Mat: A “Welcome to Whoville” or “Don’t Be a Grinch” doormat.
- Tabletop & Mantel Decor:
- Grinch Centerpiece: A Grinch figure surrounded by red and green ornaments, small “stolen” presents, or a display of “roasted beast” (faux, of course!).
- Grinch Candy Jar: Fill a clear jar with green and red candies, with a small Grinch figure peeking out.
- Whoville Village: Create a mini village scene with quirky, colorful houses and tiny Grinch characters.
- Grinch Stuffed Animals: Scatter Grinch plush toys throughout your home.
- Outdoor Decorations:
- Yard Inflatables: Grinch inflatables are widely available and make a big impact.
- Light Displays: Green and red lights, perhaps arranged to form the Grinch’s silhouette.
- Giant Stolen Sack: Create an oversized sack filled with “stolen” presents outside your door.
2.4.3. DIY Grinchy Touches
- Grinch Ornaments: Paint green baubles with Grinch faces or hand-paint iconic Grinch sayings.
- Grinch Garland: Cut out Grinch faces or heart shapes from green and red felt and string them into a garland.
- Whoville Trees: Use cone-shaped foam forms, wrap them in green or red yarn, and adorn with glitter and quirky ornaments to resemble Whoville trees.
- Grinch “Stolen” Gifts: Wrap empty boxes in plain paper, tie with a simple string, and pile them up haphazardly, as if the Grinch is mid-theft.
- Grinchy Quotes: Write famous Grinch quotes on small chalkboards or framed prints.
- Cupcake Toppers: Create Grinch-themed cupcake toppers for festive treats.
2.5. Graduation Cap Decoration: A Personalized Triumph
A graduation cap is more than just academic regalia; it’s a blank canvas for self-expression, a way to celebrate individual journeys, accomplishments, and future aspirations. Graduation cap decoration has become a beloved tradition, allowing graduates to stand out and share their unique story on their big day.
2.5.1. Brainstorming Your Theme and Message
Consider what you want your cap to represent:
- Major/Degree: Incorporate symbols, colors, or quotes related to your field of study (e.g., DNA helix for biology, equations for engineering, specific fonts for literature).
- Future Plans: Represent your dream job, next academic step, or travel aspirations.
- Gratitude: Thank family, friends, professors, or specific individuals who supported your journey.
- Humor: A funny quote, a meme, or a lighthearted illustration that captures your personality.
- Overcoming Challenges: A message of resilience, perseverance, or triumph over adversity.
- Pop Culture/Fandom: Quotes or imagery from your favorite movies, TV shows, books, or video games.
- University Pride: Your school’s mascot, colors, or motto.
2.5.2. Essential Materials and Tools
- The Cap Itself: You’ll typically decorate the top, flat square of the cap.
- Cardstock or Sturdy Paper: It’s often easier to decorate a piece of cardstock cut to the exact size of your cap’s top, then attach it to the cap. This allows for practice and easier application.
- Adhesive: Craft glue, fabric glue, or hot glue gun (for heavier embellishments).
- Scissors or Craft Knife: For cutting precise shapes.
- Ruler and Pencil: For accurate measurements and drawing guidelines.
- Decorative Elements:
- Paint: Acrylic paints are versatile for designs, lettering, and backgrounds.
- Markers: Fabric markers, permanent markers (like Sharpies) for details and lettering.
- Glitter, Sequins, Rhinestones: For sparkle and glam.
- Ribbons, Fabric Scraps: For texture and borders.
- Stickers, Die-Cuts: Pre-made elements for easy application.
- Photos: Small, laminated photos can add a personal touch.
- Felt or Foam Sheets: For dimensional elements.
- Small Artificial Flowers/Leaves: For floral designs.
2.5.3. Step-by-Step Decoration Tips
- Measure and Cut: Cut a piece of cardstock or chosen material to the exact size of your cap’s top square (usually 9.5″ x 9.5″ or 24cm x 24cm). Don’t forget to cut out a small circle in the center for the tassel button.
- Sketch Your Design: Lightly sketch your design onto the cardstock with a pencil. This allows for adjustments before committing.
- Create the Background: If you want a solid color background, paint or cover the entire cardstock first.
- Add Main Elements: Start with the largest or most central elements (e.g., painted design, photo, main quote).
- Detailing and Lettering: Use fine-tip markers or paintbrushes for text and intricate details. Ensure your lettering is legible from a distance.
- Embellish: Add glitter, rhinestones, sequins, or other dimensional elements. Allow glue to dry completely between steps.
- Final Touches: Add ribbons, small flowers, or other delicate items.
- Attach to Cap: Once your design is completely dry, use strong craft glue or fabric glue to attach the decorated cardstock to the top of your graduation cap. Press firmly and allow to dry completely.
- Check Tassel Hole: Make sure the tassel button can still be accessed through the central hole.
2.5.4. Important Considerations
- Visibility: Remember that your cap will be viewed from a distance, so ensure your message and design are clear and impactful.
- Durability: Use materials and adhesives that will hold up throughout the ceremony, especially if you’ll be outside.
- Respectful Content: Keep designs appropriate for a formal academic setting.
- Weight: Avoid making your cap too heavy, as it might become uncomfortable or prone to falling off.
3. Sourcing & Inspiration: Practical Elements for Your Decor Journey
Every decorator, from novice to expert, needs reliable sources for materials and fresh inspiration. Understanding where to find quality items and how to approach creative projects is key to successful decorating.
3.1. Exploring Floor & Decor: Tiles and Locations for Your Projects
When it comes to home improvement, especially for flooring, walls, and backsplashes, Floor & Decor is a go-to destination for many. Known for its vast selection and competitive pricing, understanding its offerings and how to utilize their floor and decor tile options can significantly elevate your projects.
3.1.1. The World of Floor & Decor Tile
Floor & Decor boasts an extensive inventory of tiles, making it a powerful resource for any design aesthetic or functional need.
- Ceramic and Porcelain Tiles: The most popular choices, offering durability, water resistance, and versatility.
- Ceramic is often more affordable and easier to cut, ideal for walls and lighter traffic floors.
- Porcelain is denser, harder, and more water-resistant, making it perfect for high-traffic areas, outdoor use, and bathrooms. It comes in a huge array of finishes, including wood-look, stone-look, and polished contemporary styles.
- Natural Stone Tiles: For a luxurious and organic feel.
- Marble: Elegant and timeless, known for its unique veining. Requires sealing.
- Travertine: Earthy tones, porous, and offers a rustic, Old-World charm. Requires sealing.
- Slate: Durable, slip-resistant, and comes in rich, varied colors, great for both indoor and outdoor.
- Granite: Extremely hard and resistant to scratches and heat, often used for countertops but also for floors.
- Mosaic Tiles: Small tiles mounted on mesh sheets, perfect for backsplashes, shower floors, and decorative accents. Available in glass, stone, ceramic, and metal, in various patterns like penny round, herringbone, and subway.
- Wood-Look and Stone-Look Tiles: Advances in printing technology allow porcelain tiles to mimic the appearance of hardwood or natural stone incredibly realistically, offering the durability of tile with the aesthetic of other materials.
- Decorative and Patterned Tiles: From intricate geometric patterns to vibrant encaustic-look designs, these tiles can be a powerful statement piece for a floor, backsplash, or accent wall, similar to creating paint wall with stencils but with permanent material.
- Other Materials: They also carry luxury vinyl plank (LVP), laminate, and hardwood flooring options, along with installation tools, sealants, and grout.
3.1.2. Design Inspiration with Floor & Decor
- Bathroom Renovations: Choose waterproof porcelain for shower walls and floors, perhaps a unique mosaic for a shower niche, and a contrasting tile for the main floor. The extensive range ensures you’ll find options for your desired bathroom wall decor style.
- Kitchen Backsplashes: Elevate your kitchen with a classic subway tile, a modern geometric pattern, or a luxurious marble mosaic. Consider a bold color or texture to complement a Martha Stewart-inspired yellow kitchen.
- Accent Walls: Use decorative tiles to create a feature wall in a dining room, living room, or even a bedroom, adding texture and visual interest. This is a more permanent alternative to paint wall with stencils.
- Outdoor Patios and Walkways: Explore durable porcelain pavers or natural stone tiles designed to withstand outdoor elements.
- Fireplace Surrounds: Revamp your fireplace with elegant stone or ceramic tiles to enhance your mantel decor.
3.1.3. Finding Floor & Decor Locations Near You
Finding a Floor & Decor location is straightforward. Their website has a comprehensive store locator feature. Simply input your zip code or city, and it will provide a list of nearby stores, along with their addresses, phone numbers, and operating hours. Many locations also offer in-store design services, allowing you to consult with experts who can help you choose the right tiles and plan your layout. Their warehouses are typically large, allowing customers to often pick up materials directly or arrange for delivery.
3.2. Decora DTI Projects: Embracing DIY and Industrial Chic
The term “Decora DTI” could refer to a specific brand or a broad style, but given the context of creative and DIY projects, we can interpret it as embracing resourceful, often textile-focused, or industrial-inspired decorating (“Decora Textil Industrial” or simply “DIY Transformed Ideas”). This approach encourages unique, handmade, and often upcycled elements to add character to your home.
3.2.1. The Essence of DIY Decora DTI
- Resourcefulness: Using existing materials, repurposing old items, and thinking outside the box.
- Personalization: Creating pieces that are truly unique to your taste and story.
- Texture and Contrast: Often combining raw, industrial elements (metal, concrete, exposed wood) with softer textiles or natural finishes.
- Functional Art: Decor that is both beautiful and serves a purpose.
- Sustainability: Reducing waste by giving new life to old objects.
3.2.2. Inspiring Decora DTI Project Ideas
- Upcycled Furniture:
- Industrial Coffee Table: Transform old wooden pallets or crates into a rustic coffee table, perhaps adding metal caster wheels for an industrial look.
- Distressed Dresser: Give an old dresser a new lease on life with chalk paint, sanding to create a distressed finish, and swapping out knobs for vintage metal pulls.
- Cable Spool Table: A large wooden cable spool can be cleaned, stained, and used as a unique side table or outdoor dining table.
- Textile Integration:
- Fabric Wall Art: Stretch beautiful fabrics (ethnic prints, vintage scarves, even remnants of old curtains) over canvases or frames to create unique wall art.
- Macrame Wall Hangings: Hand-knotted macrame pieces add bohemian texture and warmth, perfect for a dining room wall decor accent.
- Tapestries: Hang tapestries to add color, pattern, and acoustic dampening to a large wall.
- Industrial Accents:
- Pipe Shelving: Create custom shelving units using industrial pipes and reclaimed wood planks. This works well in kitchens, bathrooms (for bathroom wall decor), or living rooms.
- Concrete Planters/Countertops: DIY small concrete planters for succulents or craft a faux concrete countertop finish for an urban edge.
- Edison Bulb Lighting: Incorporate exposed Edison bulbs with metal cages or simple rope suspensions for a factory-chic lighting solution.
- Repurposed Decor:
- Jar Lighting: Transform old mason jars into pendant lights or fairy light holders.
- Bottle Vases: Use interesting old glass bottles as unique vases for single stems or dried flowers.
- Crate Storage: Wooden crates can be stacked and arranged to create rustic bookshelves or storage units.
- Ladder Display: An old wooden ladder can be repurposed as a decorative blanket holder, towel rack, or even a tiered plant stand, adding to your mantel decor or general room ambiance.
- Paint Transformations:
- Faux Finishes: Experiment with paint techniques to mimic concrete, rust, or distressed wood on various surfaces.
- Stenciled Textiles: Use fabric paint and stencils to customize plain curtains, throw pillows, or table runners, aligning with the paint wall with stencils creativity.
3.2.3. Getting Started with Your Decora DTI Project
- Seek Inspiration: Browse Pinterest, Instagram, or design blogs for ideas that resonate with you.
- Assess Your Resources: Look around your home, garage, or local thrift stores for items that can be repurposed.
- Start Small: Begin with a manageable project to build confidence and skills.
- Embrace Imperfection: DIY projects often have a handmade charm that factory-produced items lack.
- Safety First: Always use appropriate safety gear (gloves, eye protection) when working with tools or chemicals.
These diverse approaches to decorating, from grand statements to subtle touches, allow you to constantly refresh and personalize your environment. Whether you’re planning a full renovation with Floor & Decor tiles or adding a simple DIY Decora DTI piece, the joy is in the creation.
Frequently Asked Questions (FAQs)
Q1: How do I choose the right color palette for my home decorating projects?
A1: Start by considering the mood you want to create in each room. Use the 60-30-10 rule: 60% dominant color (walls, large furniture), 30% secondary color (curtains, smaller furniture), and 10% accent color (accessories, pillows). Look at color theory (warm vs. cool, complementary colors), draw inspiration from nature, or use an existing piece of art or fabric you love as a starting point. For instance, Martha Stewart yellow kitchen decor uses a cheerful yellow balanced with whites and natural wood tones.
Q2: What are some budget-friendly tips for refreshing my home decor?
A2: There are many ways to refresh on a budget! Try rearranging existing furniture, painting an accent wall, using paint wall with stencils for a custom look, swapping out throw pillows and blankets, adding plants, creating a gallery wall with affordable prints, or updating light fixtures with DIY shades. Thrift stores and flea markets are excellent for finding unique items to upcycle for Decora DTI projects.
Q3: How can I make my small bathroom feel larger with decor?
A3: For bathroom wall decor in small spaces, opt for light colors, use large mirrors to reflect light and create depth, choose floating shelves or vanities to free up floor space, and incorporate vertical elements (like tall, narrow art) to draw the eye upward. Keep clutter to a minimum and use consistent finishes for a cohesive look.
Q4: When should I start planning for seasonal or event decorations like Christmas or baby showers?
A4: It’s always best to plan ahead! For major events like baby shower decorations, start planning 1-2 months in advance to secure venues, send invitations, and order custom items. For holidays like Christmas door decorations or Grinch Christmas decorations, many people begin planning in late October or early November to avoid the rush and allow time for DIY projects or ordering special items. This also ties into external scheduling considerations, such as “when does Disneyland decorate for Christmas,” which usually starts in early November.
Q5: What are the benefits of using tile from Floor & Decor compared to other flooring options?
A5: Floor & Decor tile offers exceptional durability, water resistance (especially porcelain), and a wide variety of styles, colors, and textures suitable for various applications. It’s ideal for high-traffic areas, bathrooms, kitchens, and outdoor spaces. While installation can be more involved than, say, laminate, the longevity and aesthetic appeal of tile often make it a worthwhile investment, and Floor & Decor’s large selection and competitive pricing make it accessible.
Q6: What are some considerations for hanging heavy items like large mirrors or artwork on walls?
A6: Always use appropriate wall anchors or locate wall studs for hanging heavy items. The type of anchor depends on your wall material (drywall, plaster, brick). For particularly heavy pieces or safety-critical items (like over a bed), consider professional installation. When planning dining room wall decor or mantel decor, ensure that the wall can support the weight of your chosen pieces.
Q7: How can I personalize my graduation cap without damaging it permanently?
A7: The best way to personalize your graduation cap decoration without permanent damage is to create your design on a piece of sturdy cardstock or poster board cut to the exact size of your cap’s top. Then, use strong, but potentially removable, adhesive (like double-sided tape or fabric glue designed for temporary hold) to attach the decorated board to your cap. This allows you to remove it after the ceremony if needed and keeps the cap itself pristine.
Conclusion: Your Journey, Your Decor
From the tranquil serenity of a beautifully appointed bathroom to the joyful chaos of a Grinch-themed Christmas, and from the quiet elegance of mantel decor to the bold statement of paint wall with stencils, decorating is a powerful tool for self-expression and mood creation. We’ve explored a vast landscape of ideas, touching on everything from the timeless charm of Martha Stewart yellow kitchen decor to the practical sourcing of Floor & Decor tiles, and the personal triumph of a graduation cap decoration.
The journey of transforming a space, whether it’s for everyday living or a momentous occasion, is deeply personal. It’s about finding inspiration in unexpected places, embracing your unique style, and confidently bringing your visions to life. Remember that every detail, every color choice, and every piece of decor contributes to the story your space tells.
So, go forth and decorate with passion and purpose! Discover the perfect bathroom wall decor to create your sanctuary, plan the most memorable baby shower decorations, or add a touch of whimsy with pumpkin decorating ideas. Utilize the vast resources available at Floor & Decor locations for your foundational elements and let Decora DTI spark your DIY spirit. Your home and your celebrations are canvases awaiting your creative touch. The only limit is your imagination.