Ultimate Home & Event Decorating Guide
Transform Your Space: The Ultimate Guide to Home & Event Decorating Excellence
Estimated reading time: 15 minutes
Key Takeaways
- Home decor ranges from intimate bathroom details to grand dining room statements, offering creative ideas for every space.
- Event decor transforms celebrations like baby showers and graduations with personalized and thematic touches.
- Holiday decorations, from whimsical Grinch themes to classic Christmas displays, bring seasonal joy and character.
- DIY projects, material sourcing from places like Floor & Decor, and strategic planning empower personalized decorating.
- Effective decorating involves planning, budgeting, organization, and a willingness to express unique style, creating spaces where one can thrive.
Table of Contents
- Unlocking Your Decorating Potential: A Comprehensive Guide to Home, Event, and Holiday Transformations
- The Art of Home Decor: Crafting Environments That Inspire
- Celebrating Life’s Moments: Event Decor Unleashed
- Festive Flair: Holiday Decor Extravaganza
- Beyond the Basics: Materials, Resources, and Inspiration
- Bringing Your Decorating Dreams to Life: Practical Tips
- Frequently Asked Questions (FAQs) About Decorating
- How do I make my small bathroom wall decor feel larger?
- What are some unique pumpkin decorating ideas that don’t involve carving?
- How can I create festive Grinch Christmas decorations without buying everything new?
- What should I consider when choosing Floor & Decor tile for a high-traffic area?
- What are some affordable ideas for stunning dining room wall decor?
- How can I personalize my graduation cap decoration if I’m not artistic?
- What’s the best way to incorporate Martha Stewart yellow kitchen decor into a modern home?
- Conclusion: Decorating Your World, One Inspiring Idea at a Time
Unlocking Your Decorating Potential: A Comprehensive Guide to Home, Event, and Holiday Transformations
Decorating is more than just arranging objects; it’s about crafting an atmosphere, expressing personality, and creating spaces where memories are made and cherished. Whether you’re refreshing a cozy corner, preparing for a momentous occasion, or decking the halls for the holidays, the right decorative touches can elevate the ordinary to the extraordinary. This comprehensive guide dives deep into a myriad of decorating themes and techniques, offering easy, creative, and inspiring ideas to help you transform any space or event.
From the intimate details of bathroom wall decor to the grand statements of dining room wall decor, and from the everyday charm of mantel decor to the artistic flair of a paint wall with stencils, we’ll explore how to infuse your home with style. Beyond the home, we’ll guide you through enchanting baby shower decorations, imaginative pumpkin decorating ideas, and celebratory graduation cap decoration. As the festive season approaches, discover the joyous irreverence of Grinch Christmas decorations and the timeless warmth of Christmas door decorations. We’ll also delve into specific styles, like the vibrant appeal of Martha Stewart yellow kitchen decor, the expressive world of Decora DTI, and practical insights into Floor & Decor locations and selecting the perfect Floor & Decor tile. Prepare to be inspired, to learn, and to truly decorarán (decorate) your world with confidence and creativity.
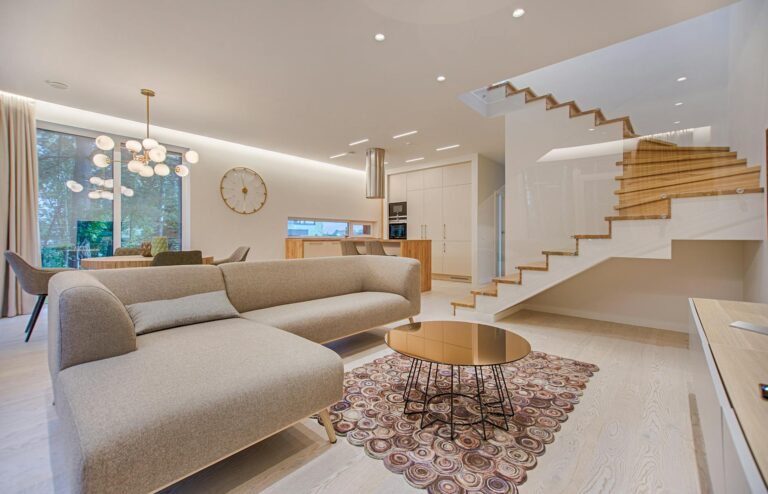
The Art of Home Decor: Crafting Environments That Inspire
Your home is a canvas, and every room presents an opportunity to tell a story. Thoughtful decor can transform mundane spaces into havens of comfort, style, and functionality. Let’s explore how to enhance the key areas of your home.
Elevating Your Bathroom: Creative Bathroom Wall Decor Ideas
The bathroom, often overlooked, holds immense potential for design impact. Bathroom wall decor can turn a purely functional space into a serene spa-like retreat or a vibrant personal sanctuary. It’s about combining aesthetics with practicality.
From Minimalist to Maximalist: Styles and Themes
- Minimalist Serenity: Embrace clean lines, neutral colors, and essential elements. Think frameless mirrors, subtle abstract art, or a single floating shelf with a small plant. The goal is an uncluttered, calming environment.
- Coastal Calm: Incorporate elements like driftwood art, framed prints of seascapes, or shelves adorned with seashells and coral. Soft blues, greens, and sandy tones will complete the look.
- Botanical Oasis: Bring the outdoors in with living plants (ferns, orchids, succulents that thrive in humidity), botanical prints, or even a statement wallpaper with a leafy pattern.
- Art Gallery Feel: Choose a selection of framed prints, photographs, or original art pieces. Arrange them in a cohesive gallery wall, perhaps with a consistent frame style, to create a focal point. Ensure art is protected from humidity if necessary.
- Industrial Chic: Exposed brick-effect wallpaper, metal shelving, and vintage-inspired signage can create a raw, sophisticated edge.
DIY Touches and Smart Storage
- Floating Shelves: Install a few floating shelves to display small decorative items, rolled towels, or essential oils. These add visual interest without taking up floor space.
- Mirrors as Art: Don’t just settle for a plain mirror. Opt for one with an ornate frame, an unusual shape, or backlighting to serve as both a functional item and a decorative statement.
- Wall Baskets: Woven baskets hung on the wall provide texture and stylish storage for toiletries, extra toilet paper, or towels.
- Personalized Signage: Create or purchase custom signs with calming quotes, funny bathroom rules, or family monograms.
- Accent Walls: Consider painting one wall in a bold color or using a peel-and-stick wallpaper with an interesting pattern to create an accent. This is an easy way to decorarán with a big impact.
Crafting Ambiance: Dining Room Wall Decor That Inspires
The dining room is a place for gathering, conversation, and culinary delight. Dining room wall decor should complement these activities, fostering an inviting and stimulating atmosphere.
Gallery Walls and Statement Pieces
- Curated Gallery Wall: A well-arranged gallery wall can be a captivating conversation starter. Mix and match framed photos, art prints, decorative plates, or even small mirrors. Vary sizes and orientations for a dynamic look, ensuring a cohesive theme or color palette ties it all together.
- Large-Scale Art: A single, oversized piece of art can make a dramatic statement, especially in a minimalist dining space. Choose a piece that resonates with your personal style and complements the room’s color scheme.
- Architectural Elements: Consider installing decorative wall moldings, wainscoting, or even faux exposed brick to add architectural interest and character.
- Mirrors for Light and Space: Large mirrors not only reflect light, making the dining room feel brighter and more spacious, but also add a touch of elegance. A decorative mirror with an interesting frame can be a beautiful focal point.
Incorporating Texture and Color
- Textural Wall Hangings: Macrame art, woven tapestries, or even a collection of decorative baskets can add warmth and tactile interest to your walls. These are perfect for creating a cozy, bohemian, or rustic vibe.
- Bold Paint or Wallpaper: An accent wall in a rich, deep color (like navy, emerald green, or a deep charcoal) can add sophistication. Alternatively, a patterned wallpaper can bring vibrancy and personality. Ensure the pattern doesn’t overwhelm the space.
- Floating Shelves with Decor: Install floating shelves to display decorative plates, ceramic vases, small sculptures, or a collection of your favorite cookbooks. This adds depth and allows for changeable decor.
- Sconces and Wall Lighting: Beyond providing ambient light, wall sconces can be decorative elements in themselves. Choose fixtures that complement your dining room’s style to add both light and visual appeal. This thoughtful addition can decoro (decorate) and illuminate simultaneously.
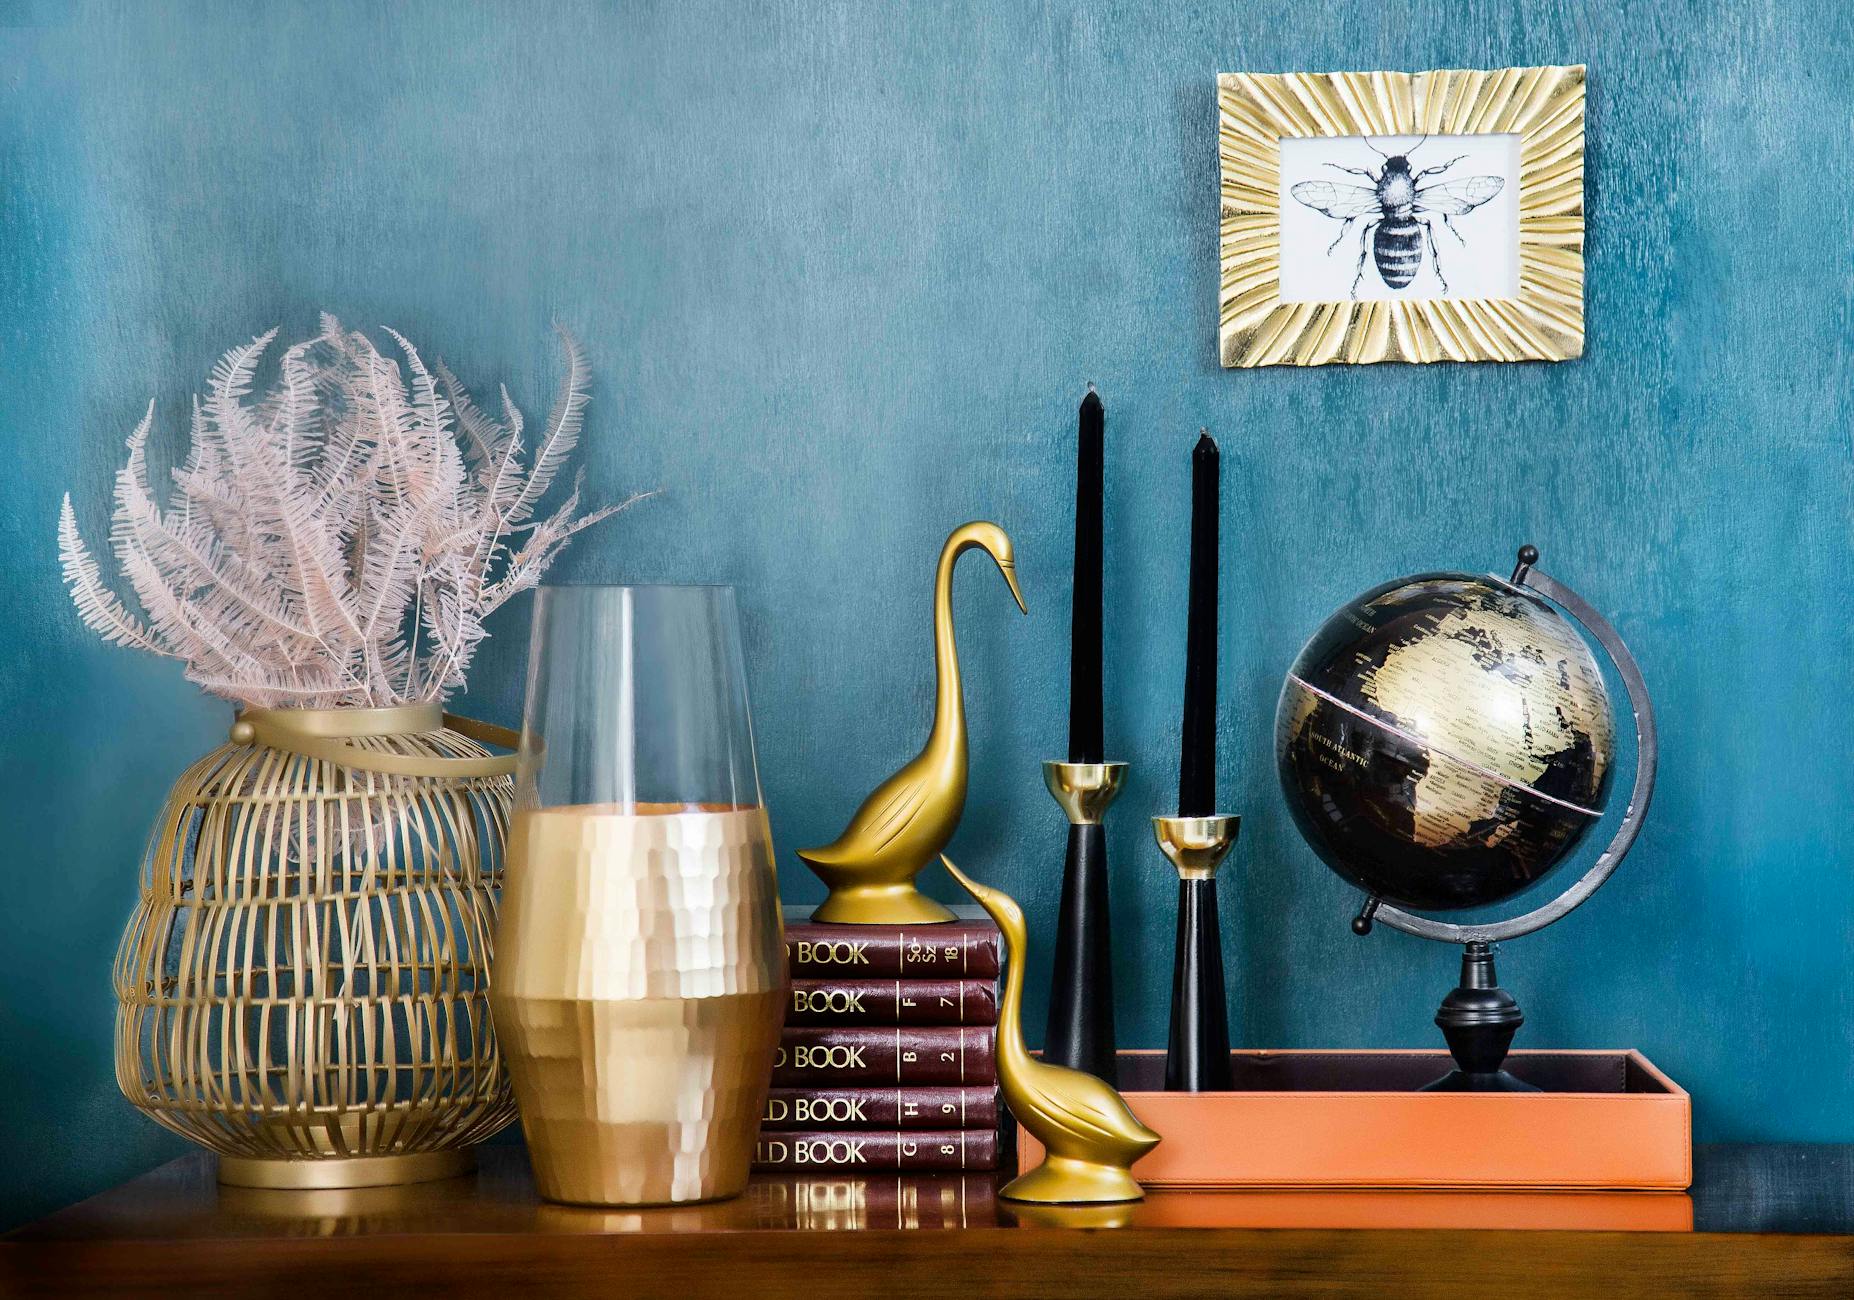
Mastering the Mantel: Year-Round Mantel Decor Inspiration
The mantelpiece is a natural focal point in many living rooms and dens, offering a prime spot for creative expression. Mantel decor allows for seasonal changes and personal touches that reflect your life and passions.
Seasonal Transformations
- Spring Refresh: Lighten things up with fresh flowers, pastel-colored vases, faux birds’ nests, and botanical prints. Incorporate elements of growth and new beginnings.
- Summer Vibrancy: Embrace bright colors, nautical themes (shells, ropes, anchors), or a collection of travel souvenirs. Keep it airy and uncluttered.
- Autumn Warmth: Utilize natural elements like mini pumpkins, gourds, fall leaves, pinecones, and candles. Rich reds, oranges, and deep browns create a cozy atmosphere.
- Winter Wonderland: Focus on candles, twinkling lights, evergreen boughs, silver and gold accents, and perhaps a few cherished holiday figurines. This leads perfectly into holiday themes.
Personal Touches and Focal Points
- Anchoring Art or Mirror: A large piece of art or an elegant mirror above the mantel serves as the primary focal point. Choose something that complements your room’s aesthetic.
- Layered Frames: Lean framed photos or smaller art pieces against the wall, layering them in front of your main focal point. This adds depth and a curated feel.
- Varying Heights: Use objects of different heights – tall vases, candlesticks, shorter figurines, and stacked books – to create visual interest and movement. The rule of threes often works well for grouping items.
- Greenery and Botanicals: Incorporate fresh or faux plants, garlands, or floral arrangements. Greenery always adds life and softness to a display.
- Curated Collections: Display a collection of treasured items, like vintage cameras, pottery, or travel mementos. This tells a personal story and makes the space uniquely yours.
Transforming Walls with Stencils: Paint Wall with Stencils
For those who desire a custom look without the commitment or cost of wallpaper, to paint wall with stencils offers an incredible solution. Stencils allow for intricate patterns, subtle textures, or bold graphic designs, giving you full creative control.
Choosing the Right Stencil Design
- Consider Your Room’s Style:
- Modern/Geometric: Look for clean lines, repeated shapes, and symmetrical patterns.
- Bohemian/Eclectic: Opt for mandalas, Moroccan-inspired designs, or organic, free-flowing motifs.
- Traditional/Classic: Damask, fleur-de-lis, or intricate floral patterns can add elegance.
- Nursery/Kids’ Room: Fun patterns like stars, polka dots, animal silhouettes, or playful landscapes are ideal.
- Scale and Impact: A large, repeating pattern works well for an accent wall, while smaller, more delicate stencils can add subtle texture to an entire room. Consider the size of the room and the overall effect you want to achieve.
- Color Choice: Your stencil color can either blend subtly with the wall color for a tone-on-tone effect or stand out boldly for a high-contrast look. Test colors on a hidden patch or scrap cardboard first.
- Durability and Reusability: Look for stencils made from durable, flexible material that can be easily cleaned and reused for multiple projects or large areas.
Step-by-Step Stenciling Guide
- Preparation is Key: Ensure your wall is clean, dry, and smooth. Apply painter’s tape to protect adjacent surfaces. Gather your supplies: stencil, stencil brush or roller, painter’s tape, level, paint, paper towels, and a drop cloth.
- Positioning the Stencil: Start at the top center of your wall or in a prominent corner. Use a level to ensure the first stencil placement is perfectly straight. Secure the stencil with painter’s tape.
- Applying Paint:
- Less is More: This is the golden rule of stenciling. Dip your brush or roller into the paint, then offload most of the excess onto a paper towel. A dry brush prevents bleeding under the stencil.
- Technique: For brushes, use a dabbing or swirling motion. For rollers, roll gently. Build up thin layers rather than applying one thick coat.
- Repeat the Pattern: Carefully remove the stencil, reposition it by aligning with the previously painted pattern (most stencils have registration marks), and repeat the painting process. Allow each painted section to dry to the touch before repositioning the stencil over it if necessary.
- Clean Up: Clean your stencil immediately after use with warm, soapy water to remove paint residue and ensure it’s ready for future projects.
Embracing Classic Charm: Martha Stewart Yellow Kitchen Decor
The mention of Martha Stewart yellow kitchen decor immediately conjures images of warmth, cheerfulness, and classic elegance. Martha Stewart is renowned for her sophisticated yet accessible style, and her use of yellow in kitchens perfectly embodies this.
The Allure of Yellow in the Kitchen
- Radiant Energy: Yellow is intrinsically linked to sunshine and happiness. In the kitchen, it evokes a sense of warmth, energy, and welcome, making it a truly inviting space for cooking and gathering.
- Versatility: From soft buttery yellows to vibrant lemon hues, yellow offers a spectrum of possibilities. Lighter shades can make a small kitchen feel larger and brighter, while deeper yellows create a cozy, historical feel.
- Mood Enhancer: Yellow is known to be an uplifting color, stimulating conversation and appetite. It’s a perfect backdrop for a room dedicated to food and family.
Key Elements of Martha Stewart’s Style
- Buttery Yellow Cabinetry: A hallmark of Martha’s classic kitchen style, yellow cabinets (often paired with white or cream trim) create a bright, airy, and inviting look. This can range from soft, almost pastel yellow to a more pronounced, sunny hue.
- Classic White Countertops: Often marble, quartz, or classic butcher block, these provide a clean contrast to the yellow and maintain a timeless appeal.
- Farmhouse Sink: A large, apron-front sink is both functional and aesthetically pleasing, aligning with the comfortable, country-chic aesthetic.
- Open Shelving: Displaying beautiful dishware, glassware, and decorative ceramics on open shelves adds personality and a lived-in feel, allowing the decor to decorarán itself.
- Natural Materials: Wood flooring, woven baskets, and natural fiber rugs contribute to the organic, grounded feel.
- Pops of Color: While yellow dominates, Martha’s style often includes subtle accents in complementary colors like soft blues, greens, or even small touches of red in cookware or textiles.
- Fresh Flowers and Greenery: A staple in any Martha Stewart setting, fresh blooms or potted herbs add life, fragrance, and a touch of organic beauty.
- Vintage Touches: Antique kitchen tools, vintage art, or heirloom pieces add character and a sense of history.
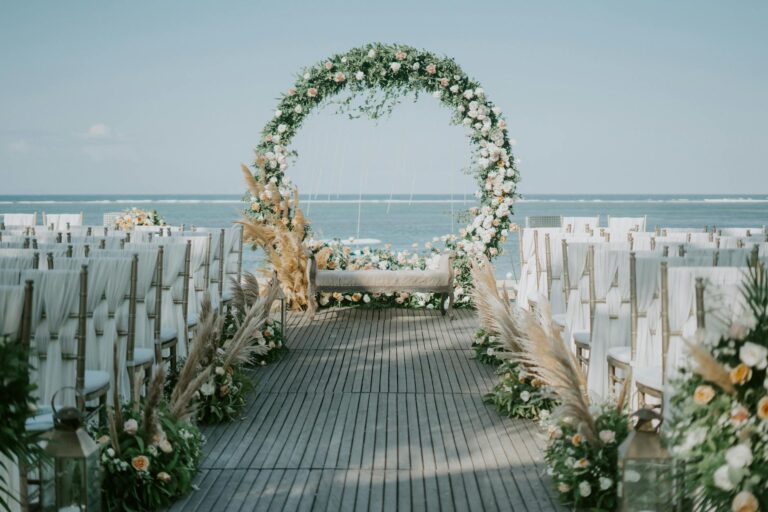
Celebrating Life’s Moments: Event Decor Unleashed
Events, big or small, are milestones that deserve to be celebrated in style. The decor sets the stage, creating memorable backdrops for life’s special occasions.
Whimsical Welcomes: Baby Shower Decorations for Every Theme
A baby shower is a joyous occasion to celebrate new life and impending parenthood. Thoughtful baby shower decorations create a festive and heartwarming atmosphere, making guests feel welcomed and the parents-to-be feel cherished.
Theme Selection and Color Palettes
- Classic “Baby” Themes: Think soft pastels, teddy bears, rubber duckies, storks, or “Twinkle Twinkle Little Star.” These are timeless and sweet.
- Nature-Inspired: Woodland creatures, “Oh Boy/Girl” with rustic touches, or a floral garden party theme are popular. Incorporate natural elements like greenery, wood slices, and muted tones.
- Whimsical & Storybook: Themes like “Up, Up, and Away” (hot air balloons), “Once Upon a Time,” or specific children’s book characters offer a magical touch.
- Gender Neutral: Increasingly popular, these themes use yellows, greens, grays, whites, or metallics, often with abstract patterns, animals, or celestial motifs.
- Bold & Modern: Geometric patterns, black and white schemes with a pop of bright color, or minimalist decor can offer a chic, contemporary feel.
DIY Decor and Personalization
- Balloon Arches & Garlands: These are showstoppers and relatively easy to DIY. Choose colors that match your theme and combine different sizes for visual impact.
- Diaper Cakes: Not only a practical gift but also a fantastic centerpiece! Decoro (decorate) with ribbons, small toys, and personalized toppers.
- Photo Booth Backdrops: Create a fun backdrop with streamers, balloons, paper flowers, or a custom banner. Provide props for memorable photos.
- Custom Banners & Signs: Personalized banners with the baby’s name (if known) or cute sayings like “Welcome Little One” add a special touch. Chalkboards or framed prints can serve as directional or informational signs.
- Table Centerpieces: Think beyond just flowers. Use baby bottles filled with treats, small potted plants, stacks of baby books, or themed figurines.
- Sweet Treats Table: A beautifully arranged dessert table with themed cupcakes, cookies, and a cake can be a major decorative element itself.
Spooky & Sweet: Pumpkin Decorating Ideas for Autumn
As autumn arrives, pumpkins become the quintessential symbol of the season. Pumpkin decorating ideas range from classic carving to no-carve artistic expressions, perfect for Halloween, Thanksgiving, or simply celebrating fall.
Carving vs. No-Carve Creativity
- Traditional Carving:
- Classic Jack-o’-Lanterns: Simple, spooky faces never go out of style.
- Intricate Designs: Use carving kits to create detailed scenes, words, or character faces.
- Layered Carving: Carve away different depths of the pumpkin skin to create shadows and highlights, adding dimension.
- No-Carve Pumpkins (Child-Friendly & Long-Lasting):
- Painted Pumpkins:
- Solid Colors: Paint pumpkins in elegant metallics (gold, silver), matte black, stark white, or vibrant pastels for a modern look.
- Patterns: Use painter’s tape to create stripes, polka dots, chevron, or geometric designs.
- Ombre Effect: Blend colors from dark to light.
- Chalkboard Paint: Allows for changeable messages or drawings.
- Glitter Pumpkins: Apply glue and sprinkle with glitter for a sparkly, glamorous effect.
- Decoupage: Use Mod Podge to apply fabric scraps, fallen leaves, printed paper, or even lace to your pumpkin.
- Embellished Pumpkins: Attach faux flowers, ribbons, buttons, googly eyes, sequins, studs, or rhinestones using hot glue.
- Mummy Pumpkins: Wrap pumpkins in white gauze or fabric strips and add googly eyes.
- Character Pumpkins: Transform pumpkins into beloved characters like Frankenstein, a witch, or even a whimsical creature using paint, felt, and other craft supplies.
- Painted Pumpkins:
Family-Friendly and Elegant Options
- Family-Friendly: Set up a “pumpkin decorating station” with non-toxic paints, markers, stickers, and craft supplies. Let everyone choose their own pumpkin and express their creativity. Stencil kits with kid-friendly designs are also a hit.
- Elegant Fall Displays:
- Monochromatic: Group pumpkins of varying sizes and shapes, all painted in shades of white, cream, or gold.
- Natural Elements: Combine pumpkins with gourds, Indian corn, colorful leaves, branches, berries, and hay bales.
- Centerpieces: Hollow out a small pumpkin to use as a vase for a fall floral arrangement.
- Porch Decor: Create a welcoming display with stacked pumpkins, lanterns, and cornstalks.
Tassel and Triumph: Graduation Cap Decoration Ideas
Graduation is a momentous achievement, and personalizing your cap is a wonderful way to stand out and express your journey, personality, or gratitude. Graduation cap decoration has become a beloved tradition.
Expressing Personality and Achievements
- Academic Achievements: Highlight your major, specific honors, or the name of your thesis or project.
- Future Plans: Display your future university, career path, or a goal you aim to achieve.
- Gratitude: Thank parents, mentors, friends, or specific professors who helped you along the way.
- School Spirit: Incorporate your school colors, mascot, or motto.
- Pop Culture References: Use quotes or imagery from movies, TV shows, or books that inspire you.
- Humor: A witty quote or a funny illustration can make your cap memorable.
- Personal Interests: Showcase hobbies, passions, or unique talents.
Materials and Techniques
- Adhesive: Hot glue, fabric glue, or strong craft glue are essential. Double-sided tape can work for lighter elements.
- Base Layer: Paint the cap’s top with acrylic paint as a base color, or cover it with cardstock, felt, or fabric for a smooth, even surface.
- Lettering:
- Stickers: Pre-cut vinyl letters or glitter letter stickers are easy and clean.
- Hand-Painted: Use acrylic paint and a fine brush for custom lettering.
- Stencils: For neat and consistent lettering, paint wall with stencils inspiration can be applied here with smaller stencils for text.
- Fabric Letters: Cut letters from felt or other fabric and glue them on.
- Embellishments:
- Glitter: Apply glue in desired patterns and sprinkle glitter.
- Rhinestones/Gems: Add sparkle and dimension.
- Flowers: Faux flowers (silk or paper) can create a beautiful, layered effect.
- Ribbons/Tassels: Add additional ribbons or small tassels for extra flair.
- Photos: Print and attach small photos of friends, family, or memorable moments.
- 3D Elements: Small toy figures, miniature replicas, or craft foam cutouts can add a fun, three-dimensional aspect.
- Protection: Once completed, spray your cap with a clear sealant (like Mod Podge clear acrylic sealer) to protect the design from smudges and weather.
Festive Flair: Holiday Decor Extravaganza
Holidays are synonymous with decorating, and the spirit of the season truly comes alive through themed adornments.
Naughty or Nice: Grinch Christmas Decorations
For those who love a bit of whimsical mischief during the holidays, Grinch Christmas decorations offer a delightful departure from traditional themes, bringing the mischievous spirit of Dr. Seuss’s classic to life.
Capturing the Spirit of Whoville
- Color Palette: Dominate with Grinch green, accented with vibrant reds, whites, and touches of blue or yellow.
- Twisted & Whimsical: Embrace the Grinch’s signature crooked and oversized elements. Think about decor that looks slightly askew, overstuffed, or comically exaggerated.
- Iconic Imagery: Incorporate images of the Grinch himself, Cindy Lou Who, Max the dog, and the playful residents of Whoville.
- “Stolen” Presents & Ornaments: Arrange presents as if they’re being “stolen” – peeking out of a chimney, hanging precariously, or stacked unevenly. Use oversized, mismatched ornaments.
DIY Grinch Projects
- Grinch Tree: Decorate your Christmas tree with red and white ornaments, striped ribbons, and a large Grinch arm (often a pool noodle wrapped in green fabric) peeking out from the top or sides, as if trying to steal a star. Add a Santa hat for a finishing touch.
- Whoville Village: Create a mini Whoville scene with cardboard cutouts of houses, faux snow, and small Grinch and Who figures.
- Grinch-Themed Wreath: Use a green wreath as a base, add red and white striped ribbons, oversized ornaments, and a cutout of the Grinch’s face or hand reaching out.
- “You’re a Mean One” Garland: Create a garland with letters spelling out classic Grinch phrases or images of the Grinch’s face.
- Grinch’s Heart: Craft oversized Grinch hearts (red with a green outline) to hang around the house.
- Stuffed Max the Dog: Use a stuffed dog with reindeer antlers as a loyal companion to your Grinch decor.
- Candy Cane Overload: Hang an abundance of candy canes, especially oversized ones, throughout your decor.
Welcoming Wonders: Christmas Door Decorations
The front door is the first impression of your holiday home, a beacon of festive cheer. Christmas door decorations can range from classic wreaths to elaborate displays that welcome guests with warmth and joy.
Garlands, Wreaths, and Beyond
- Classic Wreath: A fresh or artificial evergreen wreath, adorned with berries, pinecones, ribbons, and perhaps a bell, is a timeless choice. Personalize it with ornaments or even family photos.
- Garland Archway: Frame your doorway with a lush garland, either plain evergreen or embellished with lights, ornaments, and ribbons. As discussed by Abby Lawson in “How to Hang Outdoor Christmas Garland Around the Front Door,” ensure proper securement to avoid damage and create a lasting, beautiful look. She emphasizes creating “beautiful, organized spaces,” which extends to thoughtfully hung outdoor decor.
- Swags and Teardrops: These elegant hanging arrangements offer a more vertical accent than a traditional wreath.
- Door Wraps: Cover your entire door with festive wrapping paper or a large fabric banner, turning it into a giant “present.”
- Bow Power: A large, weather-resistant bow in a festive color can make a simple yet elegant statement.
- Light Up the Night: Incorporate strings of LED lights around your wreath or garland for a magical glow, ensuring they are outdoor-rated.
- Character Cutouts: For a playful touch, add wooden or plastic cutouts of Santa, reindeer, snowmen, or even the Grinch, peeking from behind your decor.
Incorporating Abby Lawson’s Principles for Outdoor Garland
Abby Lawson’s tips on hanging outdoor Christmas garland, while specifically focused on garland, underscore broader principles applicable to all outdoor door decorations:
- Plan Ahead for a Beautiful, Organized Space: Before you start, visualize your desired look. Measure your doorframe and determine the length of garland or the size of your wreath.
- Secure Attachment is Key: For garlands, use outdoor-rated command hooks, brick clips, or small nails/staples (if appropriate for your doorframe) to securely attach the garland. Ensure it’s sturdy enough to withstand wind and weather. Abby’s guidance on secure hanging prevents sagging and keeps your decor looking neat.
- Even Distribution and Flow: Distribute the garland evenly around the doorframe, ensuring a graceful drape. For wreaths, hang at eye level, secured with an over-the-door hanger or a strong suction cup hook.
- Complementary Elements: Consider how your door decorations tie into other outdoor elements like porch lights, planters, or window decorations, creating a cohesive and “thriving” outdoor space. This holistic approach ensures your holiday decor is not just beautiful but also well-integrated and intentional.
Beyond the Basics: Materials, Resources, and Inspiration
Decorating is an ongoing journey of discovery, and knowing where to find inspiration and materials is key to bringing your visions to life.
Exploring DIY Culture: Decora DTI Projects
The term “Decora DTI” seems to be a blend, possibly referring to DIY (Do-It-Yourself) projects within the Decora Kei Japanese street fashion subculture, which is known for its extreme layering of accessories and vibrant, playful aesthetic. If interpreted as general “DIY Decor projects,” it perfectly aligns with the spirit of creating unique, personalized decor.
What is Decora DTI (DIY Decor & Personalization)?
Assuming “Decora DTI” is a creative abbreviation for “DIY Decor and Trends/Ideas,” it represents the exciting world of crafting your own decor rather than buying everything off the shelf. It’s about:
- Personal Expression: Creating items that truly reflect your unique style, passions, and personality, moving beyond mass-produced looks.
- Budget-Friendly Solutions: Often, DIY projects are more economical than purchasing designer items, allowing you to achieve high-end looks for less.
- Sustainability: Repurposing old items, upcycling, and using natural materials reduces waste and promotes eco-conscious decorating.
- Skill Development: Learning new crafting techniques, from painting to sewing to woodworking, is a rewarding aspect of DIY.
- Community and Inspiration: Sharing ideas, tutorials, and completed projects within online communities (like Pinterest, where Abby Lawson also shares organizational ideas) or with friends fosters creativity and connection.
Embracing Personal Style
The essence of DIY decor, and potentially “Decora DTI” in a broader sense, is about breaking free from conventional rules and embracing what you love.
- Custom Color Palettes: Mix and match paints to create exactly the shade you envision for furniture, wall art, or decorative objects.
- Upcycling Furniture: Transform old dressers into new bathroom vanities, repurpose wooden crates into shelving, or give an outdated chair a fresh lease on life with new upholstery or paint.
- Handmade Textiles: Sew your own throw pillows, curtains, or table runners using unique fabrics that you can’t find in stores.
- Personalized Wall Art: Create abstract paintings, fabric art, framed collages, or use stencils for custom designs that complement your overall aesthetic.
- Found Objects as Decor: Turn interesting branches into wall decor, collect unique stones for display, or repurpose vintage bottles into vases.
- The Joy of Creation: There’s immense satisfaction in knowing you created something beautiful for your home with your own hands. This aligns with Abby Lawson’s goal of helping people create beautiful spaces where they thrive – DIY is a direct path to this.
Sourcing Your Style: Floor & Decor Locations and Tile Trends
When it comes to foundational elements like flooring and wall coverings, quality and variety are paramount. Floor & Decor locations offer an extensive selection, making it a go-to for many homeowners and designers. The choices of Floor & Decor tile can drastically impact a room’s aesthetic and functionality.
Discovering Design Possibilities at Floor & Decor
- Vast Selection: Floor & Decor stores are known for their warehouse-style layouts offering an unparalleled range of flooring options: ceramic, porcelain, natural stone (marble, granite, travertine), wood, laminate, and vinyl. This makes it easy to find everything from bathroom wall decor tiles to kitchen backsplashes and entire flooring solutions.
- In-Stock Inventory: A key advantage is often the immediate availability of materials, allowing you to start projects sooner without long lead times.
- Competitive Pricing: Direct sourcing from manufacturers often translates to competitive pricing, making high-quality materials more accessible.
- Design Services: Many locations offer free design services, where experts can help you visualize your project, select appropriate materials, and offer guidance on installation.
- Tool and Installation Supplies: Beyond just tiles, they provide a comprehensive range of tools, grouts, sealers, and setting materials, making it a one-stop shop for your flooring projects.
The Beauty and Versatility of Floor & Decor Tile
- Ceramic and Porcelain Tile: These are incredibly versatile, durable, and available in an endless array of colors, patterns, and sizes. They are ideal for high-traffic areas, bathrooms (especially for bathroom wall decor and shower surrounds), kitchens, and outdoor spaces. Wood-look and stone-look porcelain tiles offer the aesthetic appeal of natural materials with added durability and lower maintenance.
- Natural Stone Tile: For timeless elegance and luxury, options like marble, travertine, slate, and granite provide unique patterns and textures. Perfect for creating sophisticated dining room wall decor accents, entryways, or opulent bathrooms.
- Mosaic Tile: From intricate glass mosaics to natural stone patterns, these are fantastic for creating focal points, backsplashes, decorative borders, or adding a touch of sparkle to showers and accent walls.
- Specialty Tiles: Explore subway tiles for a classic look, geometric patterns for a modern vibe, or textured tiles to add depth and interest. Floor & Decor’s extensive selection allows you to find the perfect decoro (decor) for any design vision.
- Sustainability: Many tile options are durable and long-lasting, contributing to a more sustainable home environment.
Bringing Your Decorating Dreams to Life: Practical Tips
Transforming your space requires more than just inspiration; it demands a practical approach. Integrating principles of organization and careful planning, as often highlighted by Abby Lawson, can make your decorating journey smoother and more successful.
Planning and Budgeting for Your Decor Projects
A well-executed decorating project, whether it’s for bathroom wall decor or Grinch Christmas decorations, benefits from careful planning and a realistic budget. As Abby Lawson notes in her “Money Routine” discussions, having a plan helps you “thrive.”
- Define Your Vision: Before buying anything, clearly articulate what you want to achieve. Gather inspiration photos, create mood boards, and decide on a cohesive style and color palette. This applies whether you’re planning pumpkin decorating ideas or a full room makeover.
- Prioritize Projects: If you have multiple decorating ideas, decide which ones are most important or urgent. Tackle one area at a time to avoid feeling overwhelmed.
- Set a Realistic Budget: Research the cost of materials (like Floor & Decor tile), furniture, and any professional help you might need. Allocate funds for each item and stick to it. Don’t forget to factor in small expenses like paint, brushes, and adhesive.
- Shop Smart: Look for sales, use coupons, and consider DIY options (like paint wall with stencils or Decora DTI projects) to save money. Secondhand stores and online marketplaces can also yield unique finds.
- Track Expenses: Keep a running tally of what you spend to ensure you stay within your budget. This financial discipline is key to creating beautiful spaces without financial stress, a theme central to Abby Lawson’s organizational advice.
Organizing Your Decorating Journey
Just as Abby Lawson advocates for “beautiful, organized spaces,” maintaining an organized approach to your decorating projects will yield better results and reduce stress.
- Declutter First: Before you add new decor, clear out anything you no longer love or need. A clean slate helps you visualize and implement new designs more effectively. This is crucial for areas like mantel decor or dining room wall decor.
- Create a Decor Inventory: Keep a list or photo album of your existing decor items. This helps you reuse pieces, avoid duplicates, and ensure everything has a place.
- Storage Solutions: Invest in smart storage for seasonal decorations (like Christmas door decorations or baby shower decorations) or items you rotate. Clearly label bins and boxes.
- Maintain a “Project Box”: For ongoing DIY or craft projects, keep all related supplies in one designated box or container. This prevents scattered messes and ensures you can easily pick up where you left off.
- Regular Refresh: Periodically reassess your decor. What still brings you joy? What needs updating? A regular refresh keeps your home feeling vibrant and personal. This organized approach to maintenance ensures your spaces continue to “thrive.”
Frequently Asked Questions (FAQs) About Decorating
How do I make my small bathroom wall decor feel larger?
Answer: To make a small bathroom feel larger, opt for light colors, large mirrors to reflect light, floating shelves to keep the floor clear, and minimalist art. Consider a single statement piece rather than too many small items to avoid clutter. Vertical elements, like tall, narrow art or striped wallpaper, can also draw the eye upward, creating a sense of height.
What are some unique pumpkin decorating ideas that don’t involve carving?
Answer: Beyond carving, you can paint pumpkins in solid colors, patterns (stripes, polka dots), or an ombre effect. Glitter, decoupage with fabric or paper, attaching faux flowers or lace, and using permanent markers for intricate designs are popular no-carve options. You can also use temporary tattoos, pushpins, or even wrap them with yarn or fabric.
How can I create festive Grinch Christmas decorations without buying everything new?
Answer: Embrace DIY! Use green and red fabric scraps to make Grinch-inspired bows or garlands. Repurpose old ornaments by painting them green or red and adding Grinch faces. You can create a Grinch’s arm from a pool noodle and green felt for your tree. Look for oversized, quirky items at thrift stores that can be painted or embellished to fit the Whoville aesthetic.
What should I consider when choosing Floor & Decor tile for a high-traffic area?
Answer: For high-traffic areas, prioritize durability and low maintenance. Porcelain tile is an excellent choice due to its hardness, scratch resistance, and water resistance. Look for tiles with a PEI (Porcelain Enamel Institute) rating of 4 or 5. Also, consider rectified tiles for tighter grout lines, which can make cleaning easier. Darker colors or patterned tiles can help hide dirt and wear.
What are some affordable ideas for stunning dining room wall decor?
Answer: Affordable ideas include creating a gallery wall with inexpensive frames and prints (you can even print high-resolution digital art yourself). Use peel-and-stick wallpaper for an accent wall. Hang decorative mirrors from thrift stores that you can repaint. Create your own abstract art using canvas and acrylics, or frame interesting fabric swatches. Floating shelves with curated finds can also be budget-friendly.
How can I personalize my graduation cap decoration if I’m not artistic?
Answer: You don’t need to be an artist! Use pre-made vinyl letter stickers for text. Print out quotes or images and adhere them to your cap. Fabric glue can attach faux flowers, ribbons, or small pompoms. Consider using stencils for neat designs, or simply cover the top with a favorite patterned fabric and add a single, meaningful word or initial.
What’s the best way to incorporate Martha Stewart yellow kitchen decor into a modern home?
Answer: Blend classic charm with modern aesthetics. Use a softer, more muted buttery yellow for cabinetry or an accent wall. Pair it with sleek, contemporary hardware, stainless steel appliances, and minimalist light fixtures. Introduce modern art or geometric patterns in textiles. The key is to use yellow as a warm, inviting backdrop, allowing modern elements to shine through in complementary, clean lines.
Conclusion: Decorating Your World, One Inspiring Idea at a Time
Decorating is a journey of creativity, personalization, and transformation. From conceptualizing the perfect bathroom wall decor to meticulously hanging Christmas door decorations, every choice you make contributes to the story of your home and the memories of your events. We’ve explored a vibrant spectrum of possibilities, touching upon the timeless charm of Martha Stewart yellow kitchen decor, the playful spirit of Grinch Christmas decorations, the unique expressions of graduation cap decoration, and the practical elegance of Floor & Decor tile.
Remember that decorating is not about achieving perfection, but about creating spaces that resonate with you. Whether you’re embarking on Decora DTI projects to express your inner artisan, seeking the ideal dining room wall decor to foster conversation, or simply looking for fresh pumpkin decorating ideas to celebrate a season, the opportunities are endless. Embrace the process, draw inspiration from diverse sources (even insights from creating “organized spaces” as highlighted by Abby Lawson can guide your decor planning), and don’t be afraid to experiment.
May this guide empower you to decorarán your surroundings with confidence, joy, and a style that is uniquely your own. Your home and events deserve to be beautiful, organized, and truly reflective of the vibrant life you lead.